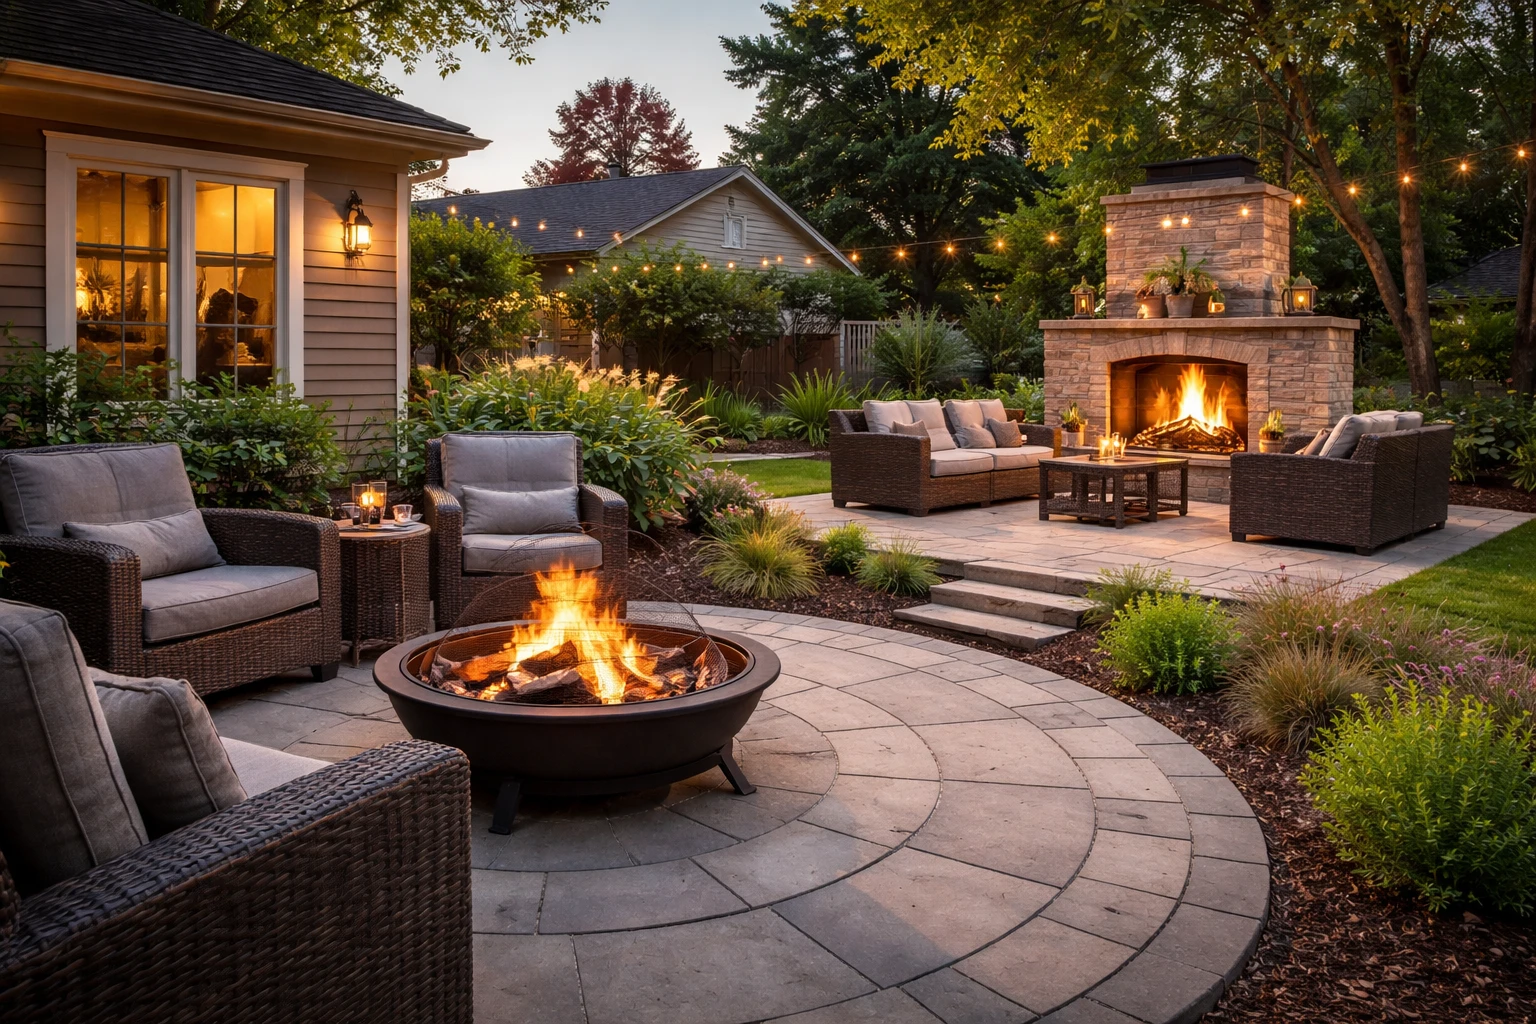
Fire pits invite everyone to gather around an open flame in a circle, while outdoor fireplaces create that cosy living room vibe with a structured focal point. Both extend your outdoor season into cooler months, but the fire pit vs fireplace decision depends on how you use your space.
Fire pits work better for casual get-togethers where people want to sit around and chat. They’re affordable, portable, and easy to reposition in your yard. Outdoor fireplaces, on the other hand, feel more permanent and push more heat in one direction. That’s why they’re great if you want a dedicated entertaining area.
So which one fits your backyard? We’ll compare them on style, budget, heat output, and maintenance requirements so you can make the right choice.
Style and Design Differences
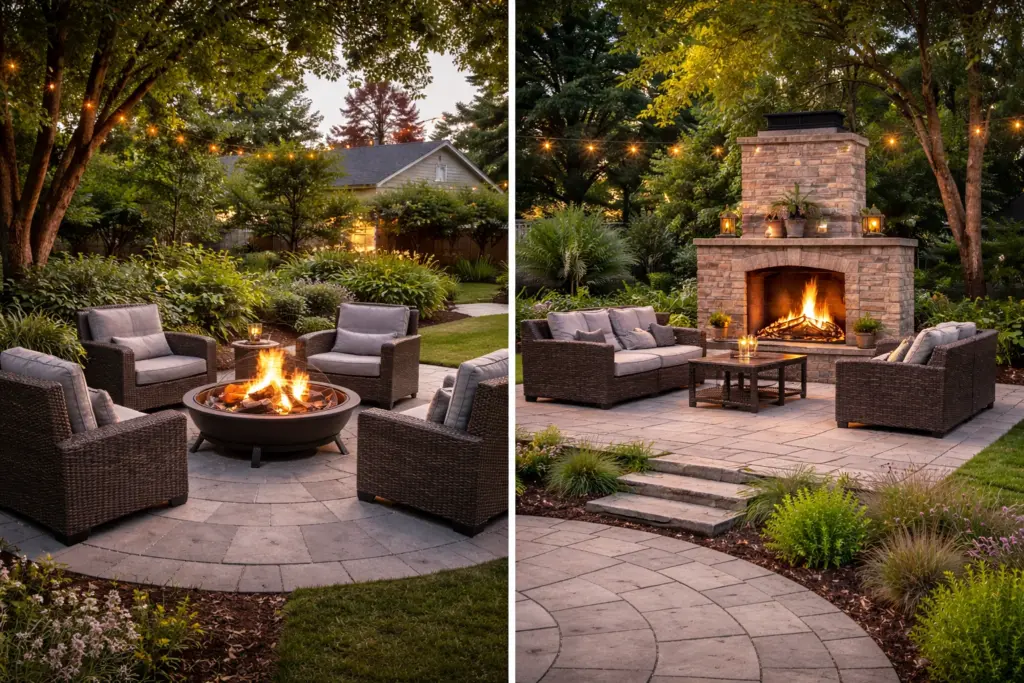
Ever noticed how fire pits and outdoor fireplaces look nothing alike, even though they do the same basic job? It’s because their design shapes where you can place them, how people gather around them, and how your backyard feels as a whole. Let’s take a closer look at what sets them apart.
Fire Pits vs Outdoor Fireplaces
Flexibility: Fire pits range from portable bowl designs to custom-built tables with stone, tile, or concrete finishes. You can move them around or make them permanent. Outdoor fireplaces don’t budge once they’re in, built with brick or stone surrounds that anchor your backyard setup.
Height and Placement: Fire pits sit low to the ground, usually table height or lower, like a coffee table. Fireplaces tower over them, starting at three feet tall for gas models and going higher with chimneys for wood-burning options.
Style Options: Both give you plenty of choices. Fire pits come in rustic cast iron or sleek modern looks with coloured glass media. Outdoor fireplaces offer traditional or contemporary designs with mantels and stonework you can customise to match your home.
Fire pits work as flexible outdoor decor that adapts to your setup, while fireplaces define the rest of the space.
Heat Output: How Fire Pits and Fireplaces Compare
Fire pits send warmth in all directions, so everyone around can feel it. The flickering flames look fantastic, but a cold breeze often pushes the heat out of reach, leaving some spots cooler than others. You’ve probably seen people nudging their chairs closer to stay comfortable.
Outdoor fireplaces work differently. They focus warmth forward, and the structure shields you from the wind. The brick or stone interior holds heat longer and keeps the area comfortable even after you lower the flames. Around Brisbane, southerly winds can push heat away from open fire pits, while fireplaces still provide a cosy spot for seating.
For consistent warmth in windy conditions, an outdoor fireplace is the safer choice. A fire pit works best if you prefer casual, all-around heat that lets everyone gather freely.
Cost Comparison
Once you know the upfront cost of each option, you can budget more accurately and avoid unexpected expenses. Here’s how fire pits and outdoor fireplaces stack up:
Feature
Fire Pits
Outdoor Fireplaces
Starting Price
$500
$3,000
Upper Range
$6,000
$24,000
Installation
DIY or professional
Professional required
Fuel Options
Gas or wood burning
Gas or wood-burning fireplace
Basic fire pits start at around $500, while custom-built designs with premium stone or tile finishes can reach $6,000.
Outdoor fireplaces, on the other hand, tend to cost more because you’re paying for the firebox, surround, and chimney (chimneys aren’t cheap to build, turns out). Prices typically range from $3,000 to $24,000, depending on materials and features.
For example, gas models have higher upfront costs than wood-burning options but require less ongoing maintenance. Adding custom-built stonework or decorative mantels can push the price even higher.
Space Needed for Each Feature
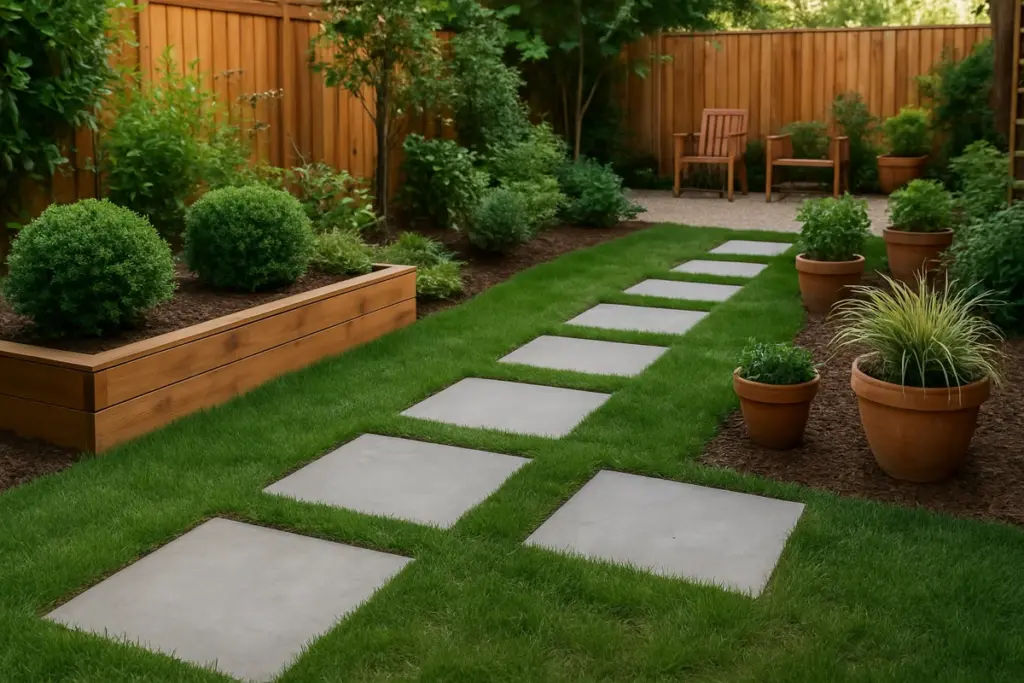
Think your backyard’s too small for a fire feature? Think again. Smaller spaces can actually work in your favour, especially with fire pits. These little wonders sit low to the ground, so you can tuck them on patios or into tight corners without taking over the yard. Chairs can circle freely, and everyone still gets a good view of the flames.
Outdoor fireplaces play by a different set of rules. Their height and depth demand more room, and you’ll need clearance from walls, rooflines, and neighbouring boundaries. Wood-burning models add chimneys, taking up even more space. You’ll also want space in front for furniture to enjoy the fire.
Placement affects how much usable space remains for garden beds, dining areas, and other outdoor zones. Fire pits let you position them flexibly without blocking views or access, while fireplaces need careful planning to make the most of your backyard.
Which One Suits Your Entertaining Style?
It depends on whether you host large, casual groups or prefer smaller, intimate gatherings. Fire pits shine for relaxed get-togethers where guests move around and chat in circles, while outdoor fireplaces work better for quieter moments with just a few people.
Here’s how each one changes the feel of your backyard.
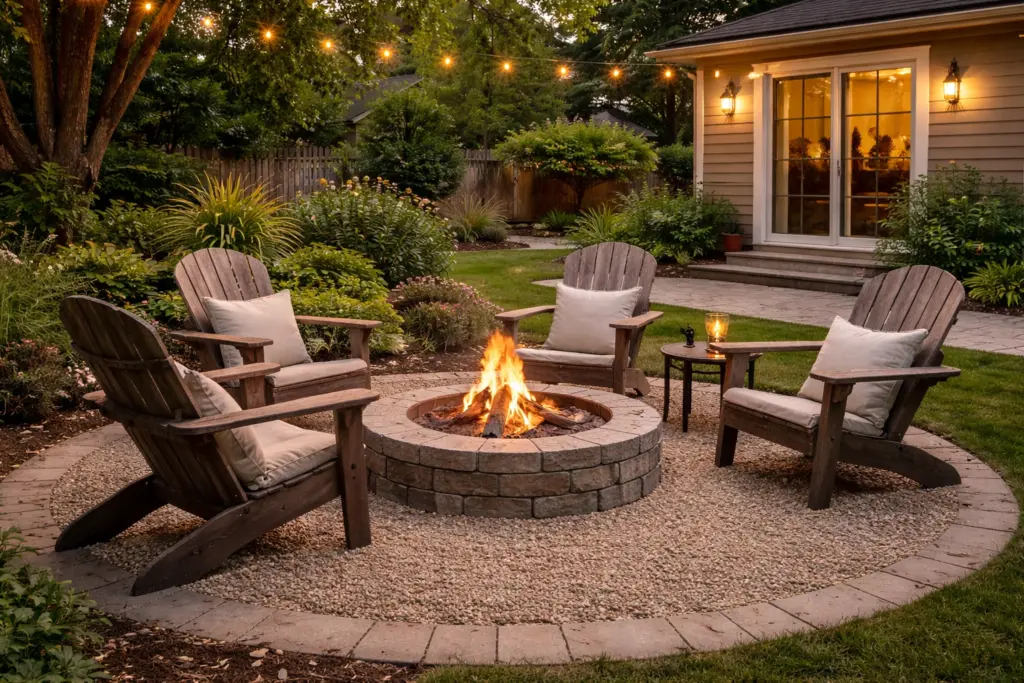
Fire Pits for Group Gatherings
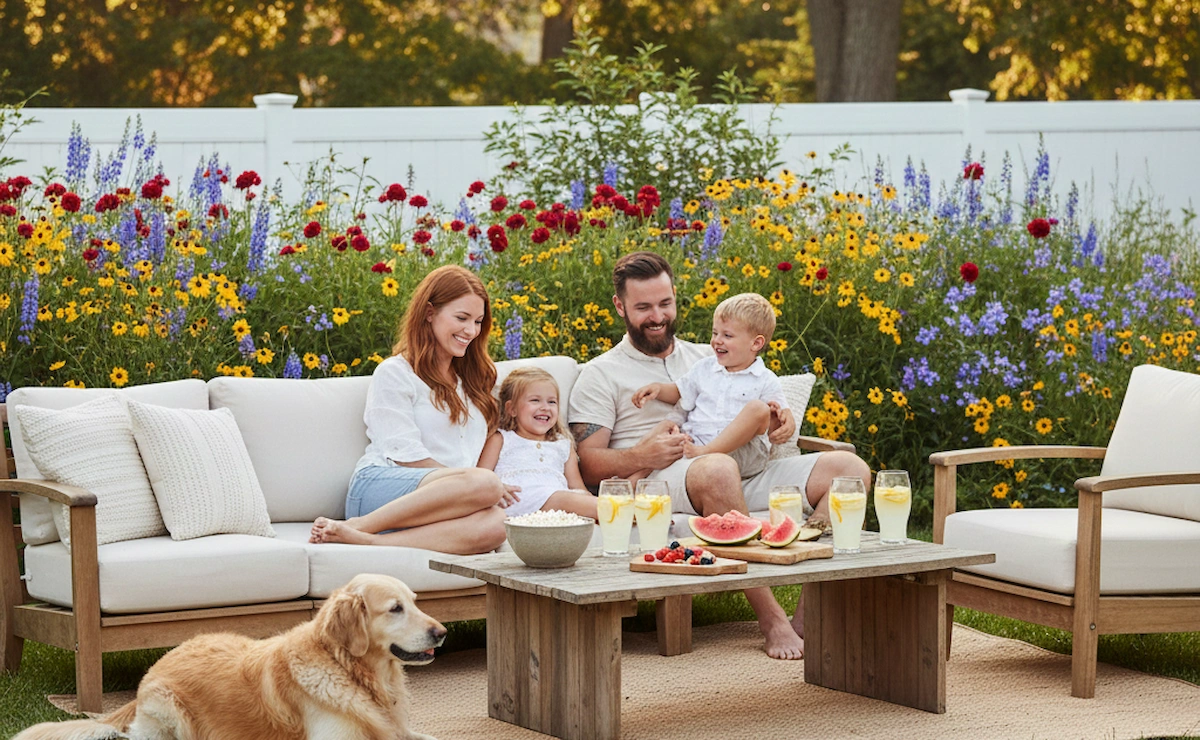
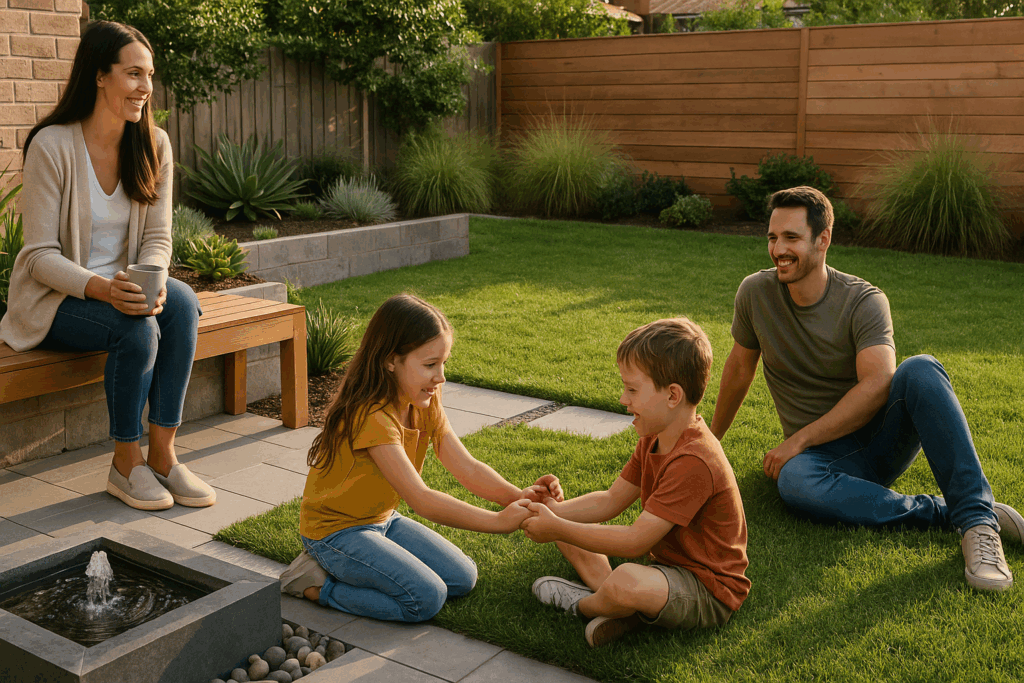
Open flames invite everyone to pull chairs around from all sides, creating natural conversation circles where everyone gets equal warmth. In our experience with Brisbane backyards, fire pits naturally become the gathering spot during weekend get-togethers.
This casual setup suits relaxed entertaining where guests mingle and move around freely. You can fit eight people just as easily as four, without the space feeling too crowded or too empty.
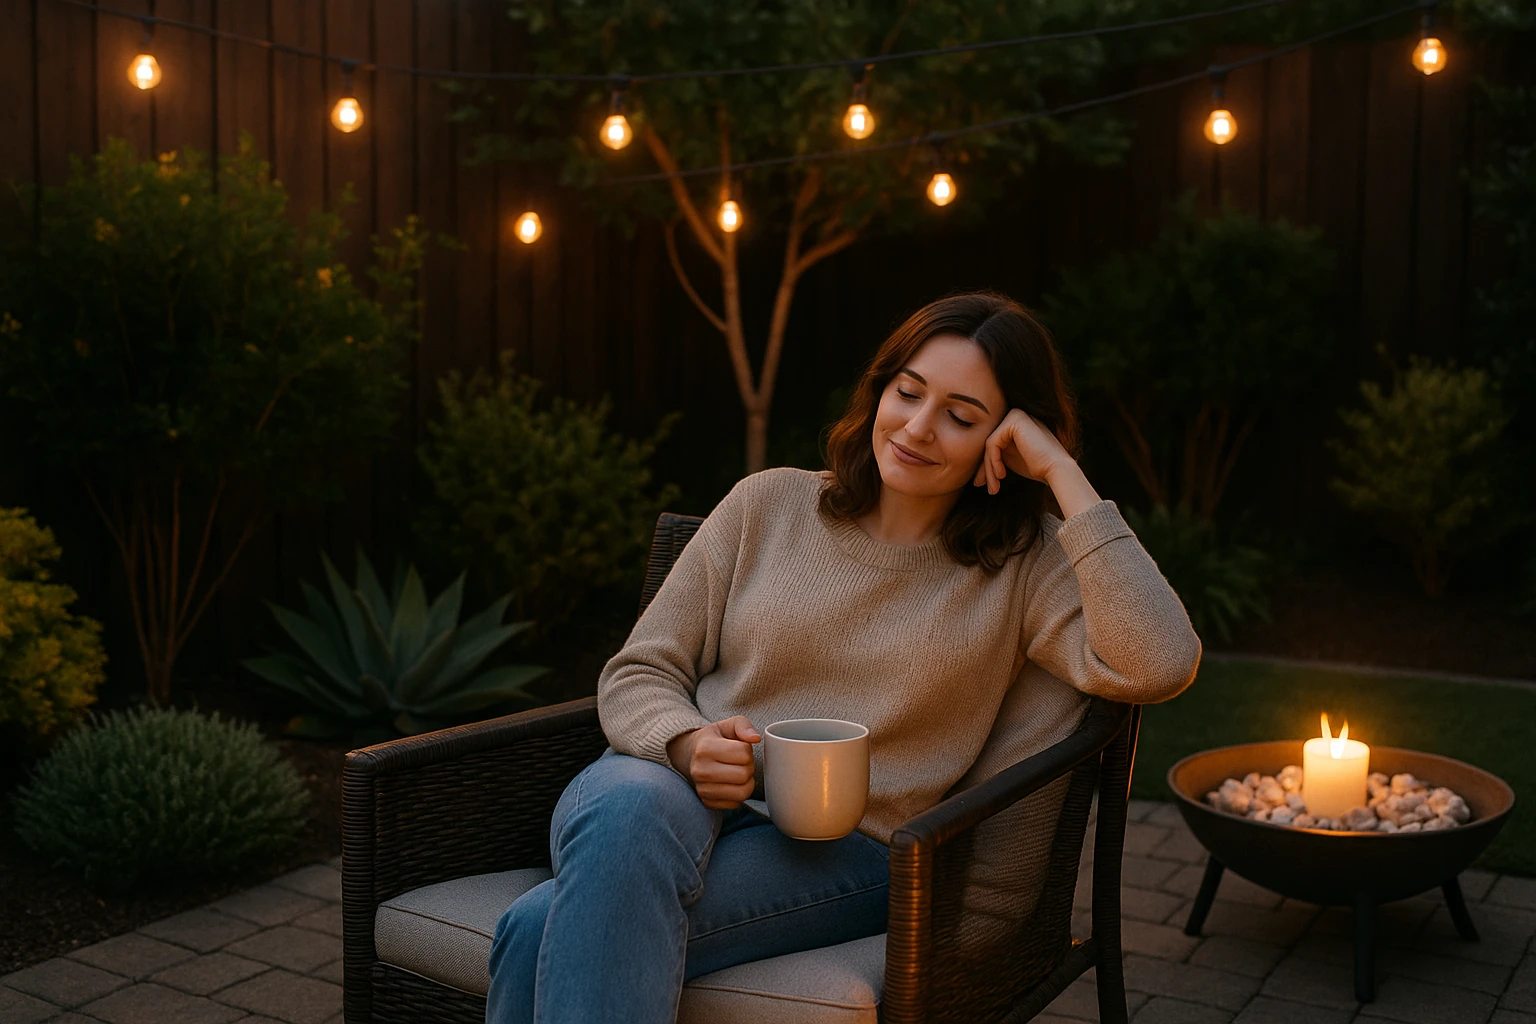
Fireplaces for Quieter Nights
If you’re more about quiet nights with a glass of wine than hosting the neighbourhood, outdoor fireplaces make more sense. The enclosed design creates a cosy focal point that feels right with just two or three people. Seating naturally faces the firebox, which makes your outdoor space feel something closer to a living room than a backyard party zone.
Safety Considerations
Both options are safe when installed properly, but fire pits need closer supervision because flames are open on all sides and sparks can pop out unexpectedly. You can add screens to keep things contained. Gas fire pits cut down on the spark issue, but you’ll still want wind guards around the flames if kids are running around nearby.
Outdoor fireplaces offer more built-in protection. Their fireboxes and mesh or glass doors keep flames contained and catch any stray embers. Gas models add extra safety with glass doors, while wood-burning fireplaces have chimneys that draw smoke upward, so your seating area stays comfortable and free of smoke.
Pro tip: Check Australian fire safety guidelines for safe outdoor burning before installing or using a fire pit or outdoor fireplace.
Choosing Your Backyard Fire Feature
The right fire feature comes down to how you actually use your outdoor space. Fire pits work for regular group gatherings where you want everyone sitting in a circle. Outdoor fireplaces fit smaller crowds and create that living room feel in your backyard.
Both options add warmth and extend your time outdoors year-round. Think about your typical evening at home. Are you hosting eight mates for a BBQ, or unwinding with your partner after work? That answer tells you which one belongs in your patio setup.
Ready to add a fire feature to your own home? Start with your space, budget, and how you entertain. And if you need help planning it out, reach out to Avalon Acres, and we’ll help you create an outdoor space that works for your lifestyle.
Most homeowners want a yard that looks good without taking over their lives. But did you know that Australian gardens use about 40% of household water during summer? Yes, you read it right! And most of it goes to high-maintenance lawns and thirsty plants.
However, there’s an easier, low-maintenance way to garden. This means choosing plants and features that actually suit Brisbane’s climate, so you’re not constantly trying to keep them alive.
It’s a win-win because you save on your water bill while doing something good for the environment.
In this article, you’ll find simple landscaping ideas for front yards. We’ll talk about backyard projects that you can finish in a weekend, and ground cover options that cut down on mowing.
So, let’s find some yard landscaping ideas that don’t need the endless upkeep.
What Makes a Garden Low-Maintenance?
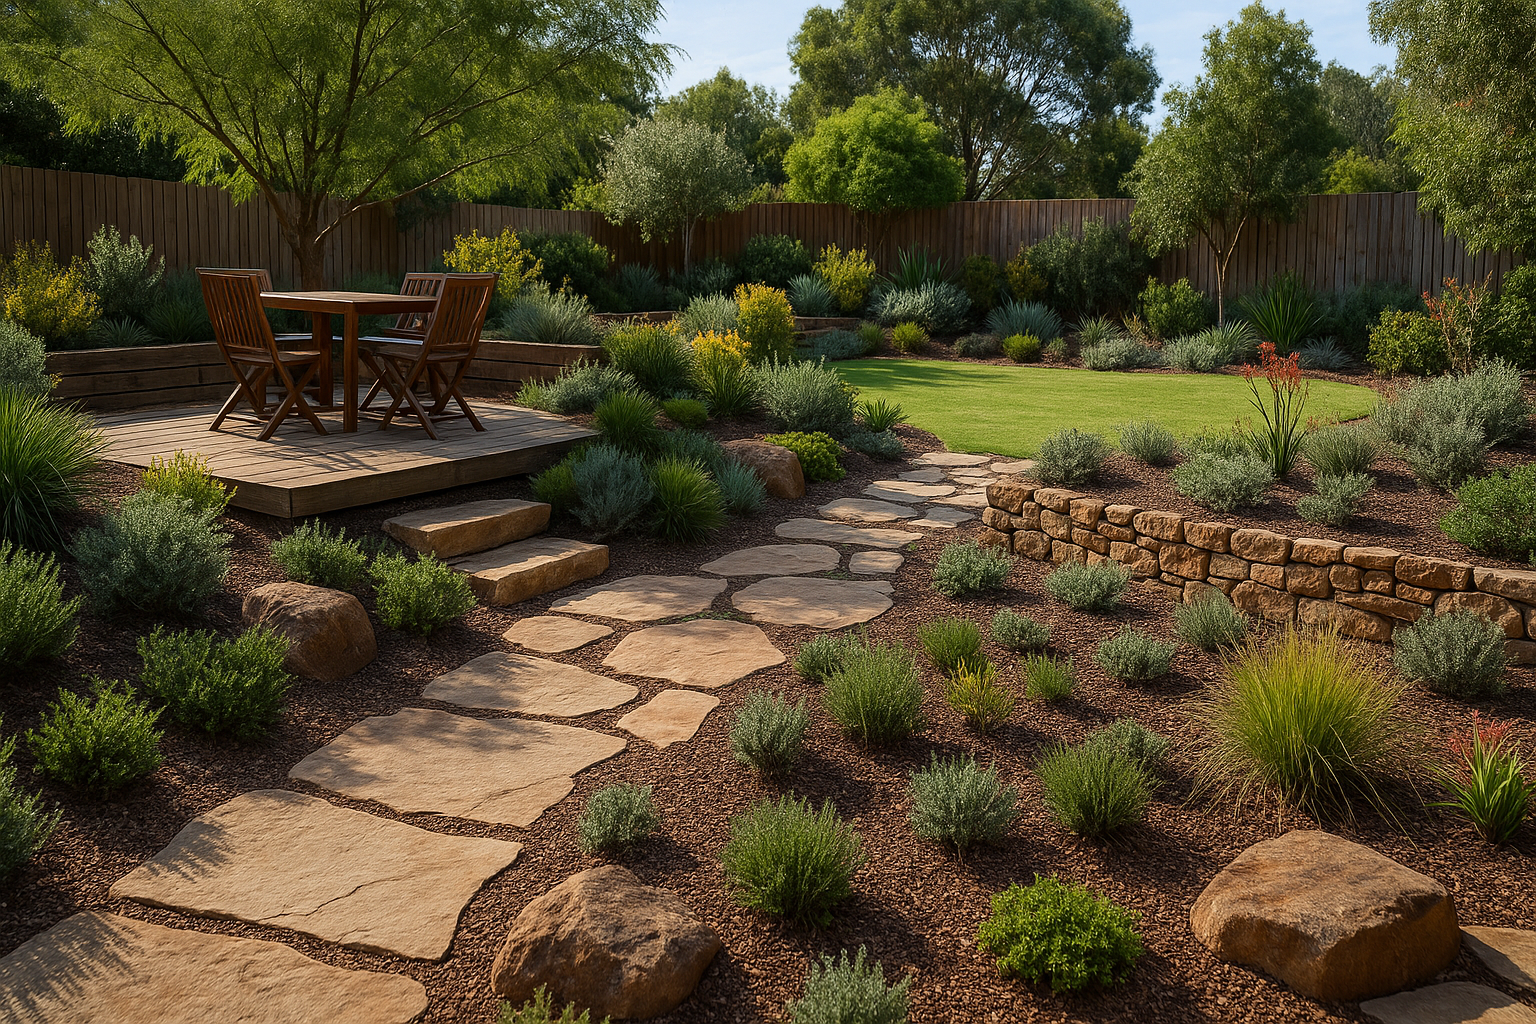
A low-maintenance garden uses plants and materials that survive the local climate without needing you to water, prune, or fertilise them every week. This type of landscaping relies on drought-tolerant plants, mulch, and hardscape elements that don’t need constant watering or trimming to survive.
Native plants suit Brisbane summers and storms without needing constant care or extra fertiliser to keep going. They can handle the heat, manage through dry stretches, and they don’t collapse the moment you forget to water for a fortnight.
Even better, a good garden design means you need less weeding, less mowing, and get free time on weekends. So when you pick the right plants and materials upfront, maintenance drops off, and you get your life back.
Long-Lasting Garden Beds That Stay Put
Well-planned garden beds look good for years without you having to constantly replant or top up the soil. Once you set them up right, they hold their form and stay looking decent without much effort from you.
Here are some good examples for your garden.
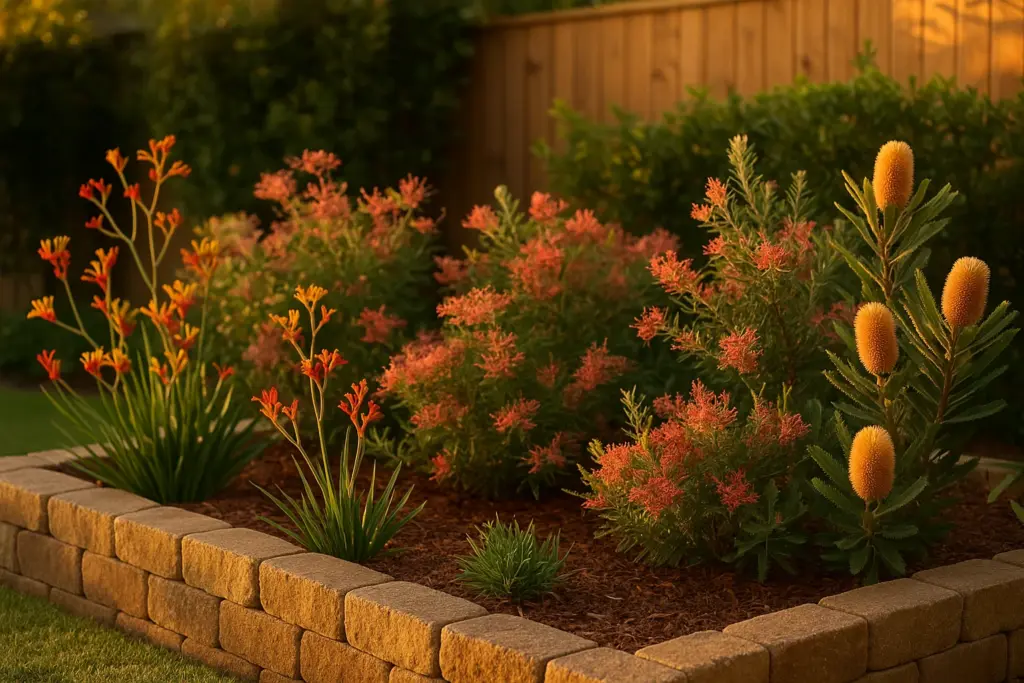
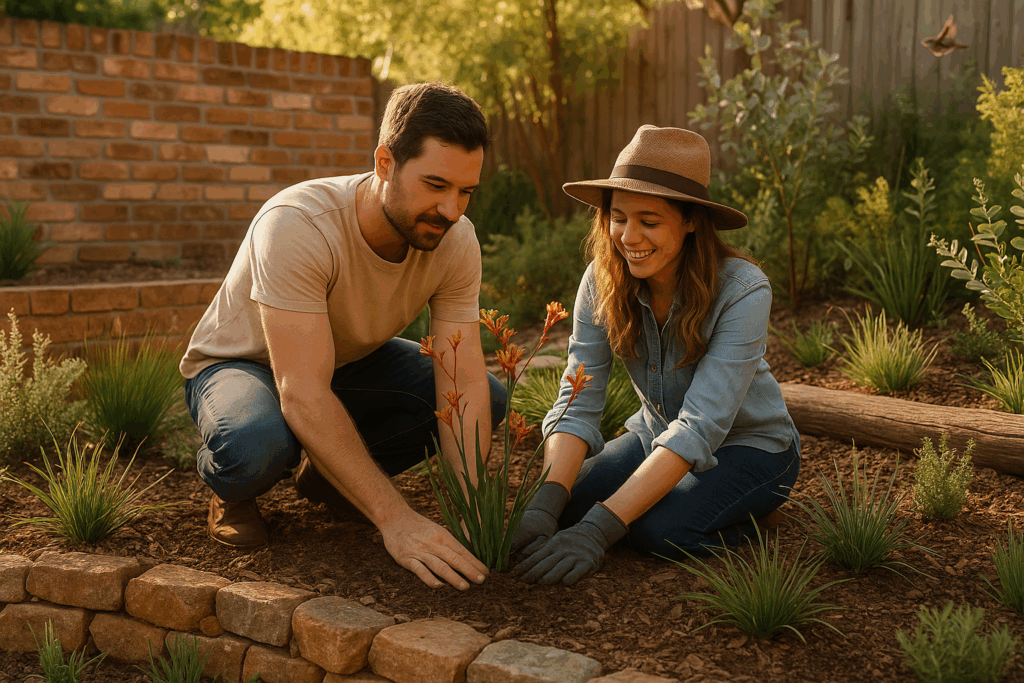
Native Plants for Colour
Kangaroo paw, grevillea, and banksia grow well in Brisbane without needing much water or fussy soil conditions to thrive. These hardy natives stay colourful year-round and attract plenty of birdlife through the growing season. In fact, native plants need 60% less water than turfgrass.
Pro Tip: Mulch around native plants keeps weeds down and moisture in. It locks in what little rain we get and stops the soil from drying out too fast.
Succulent Patches: Set and Forget
They can grow in conditions that would kill off most other plants. Succulents like agave and echeveria can absorb full sun and dry spells, which makes them perfect for front yard spots that bake all summer.
You can water them just once a fortnight in summer, even less in winter, and they’ll keep their shape without any drama. In fact, the less you fuss, the better they perform.
One idea is to plant them in clusters with dark gravel or mulch underneath. They usually look sculptural and need almost no maintenance after planting. Strange as it sounds, they actually love the neglect.
Raised Beds When Space Gets Tight
Raised beds work well for small and compact spaces. They give you better control over soil and easier access without bending over constantly, especially when your yard doesn’t have much room to work with.
We recommend using timber sleepers or rendered brick for a clean look that holds up in Queensland weather and doesn’t rot quickly.
You can fill them with herbs, small shrubs, or compact natives. They usually drain well and keep roots contained, so plants don’t spread everywhere and take over areas you didn’t plan for.
Ground Covers That Look Great Without the Mowing
Ground covers are the easiest way to keep your yard green without committing to weekend lawn care. If you choose right, you get the same lush look, without all the maintenance.
Take a look at these ground cover ideas:
River Rock or Gravel: This type of cover spreads fast, doesn’t blow away in the wind, and stops weeds from popping up between pavers. Plus, landscaping rocks give you coverage without the ongoing fuss of keeping grass alive.
Mulch: The main benefit of mulch is that it keeps garden beds looking tidy and locks moisture into the soil. It also stops the summer heat from baking everything underneath, and plants stay healthier during Brisbane’s dry stretches.
Mix Textures: You can go for gravel paths with mulched garden beds for visual interest that doesn’t need constant upkeep or replanting every season. Different materials actually break up the space and add depth.
Instead of relying solely on rocks or mulch, you can also use low-growing plants as ground cover. These plants spread naturally, fill spaces on their own, handle Brisbane’s heat better than traditional lawns, and bounce back quickly after dry spells.
Edging and Borders That Hold Their Shape
Edging creates clean lines between your lawn and garden beds, and stops grass from invading. This makes your mowing faster and easier, and saves you time every single week.
From our experience, steel or aluminium edging stops grass from creeping into your beds. The metal holds its position and creates defined zones that last for years without shifting or breaking down. So you know exactly where to stop, and don’t have to trim edges manually every fortnight.
Pro Tip: Use river rock, brick, or timber sleepers as natural-looking borders. These materials can handle the weather and don’t need replacing every year. Also, they blend in with the landscaping and give you long-term preservation.
Front Yard Updates for Busy Homeowners
Most front yards cop the full brunt of the Brisbane sun, which makes picking the right plants and layout even more important. You’d want something that survives while saving time, using less water, and still giving you curb appeal worth showing off.
Here are some efficient ideas:
Gravel Gardens: Replace high-maintenance lawn sections with gravel and hardy plants like yucca or lomandra. This works especially well in areas with water restrictions, where keeping grass green becomes expensive and frustrating.
Statement Plants: One solid feature plant near your door, like a dragon tree or bird of paradise, changes how the whole space reads. It also creates a great focal point as a statement piece.
Timed Irrigation: You can install drip irrigation on a timer so plants get watered consistently without you remembering to drag the hose out every second day.
These front yard updates take only a weekend to set up, and you get years off your ongoing maintenance schedule. So, pick one or two that suit your space, and you’ll notice the improvement immediately.
Backyard Landscaping You Can Finish This Weekend
Small projects that add greenery or create space for sitting upgrade your backyard instantly. Even though most backyard landscaping projects sound like month-long commitments, these two can be done on a Saturday afternoon with basic tools.
See what we’ve put together.
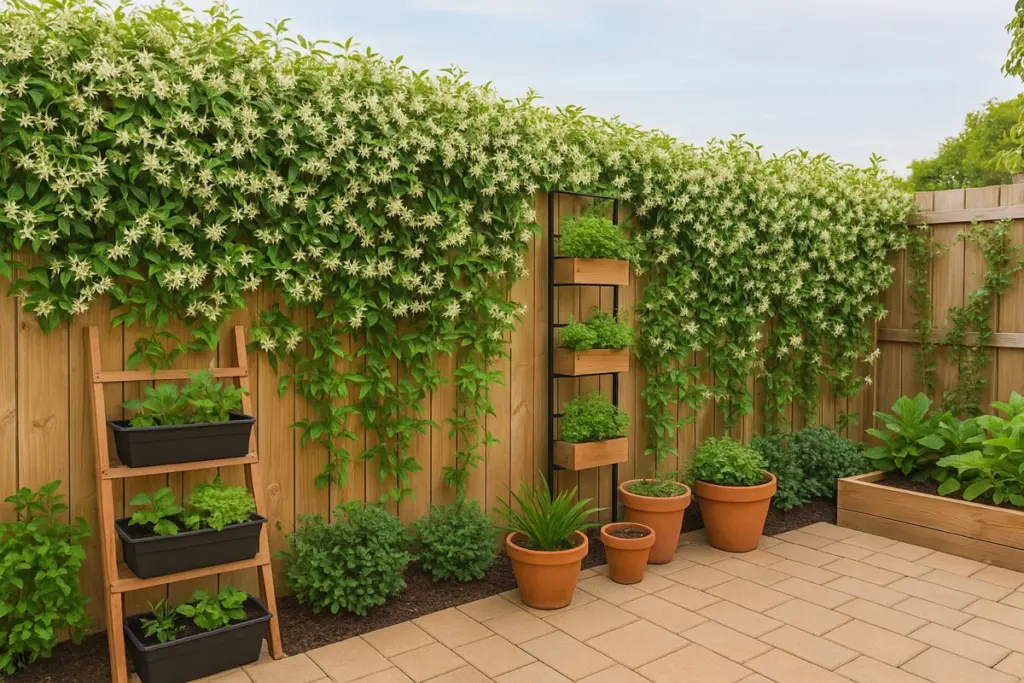
Vertical Gardens on Bare Walls
One great idea is to mount planter boxes or modular wall panels on fences or blank walls. They take up no floor space at all, which is great for when you’re working with small yards or compact spaces.
To give you an idea, herbs, succulents, or trailing climbing plants don’t need much water and look good without constant trimming or fuss.
Plus, vertical setups work well for renters or small courtyards where every bit of ground space is important. Plus, containers on walls give you planting areas without committing to permanent garden beds.
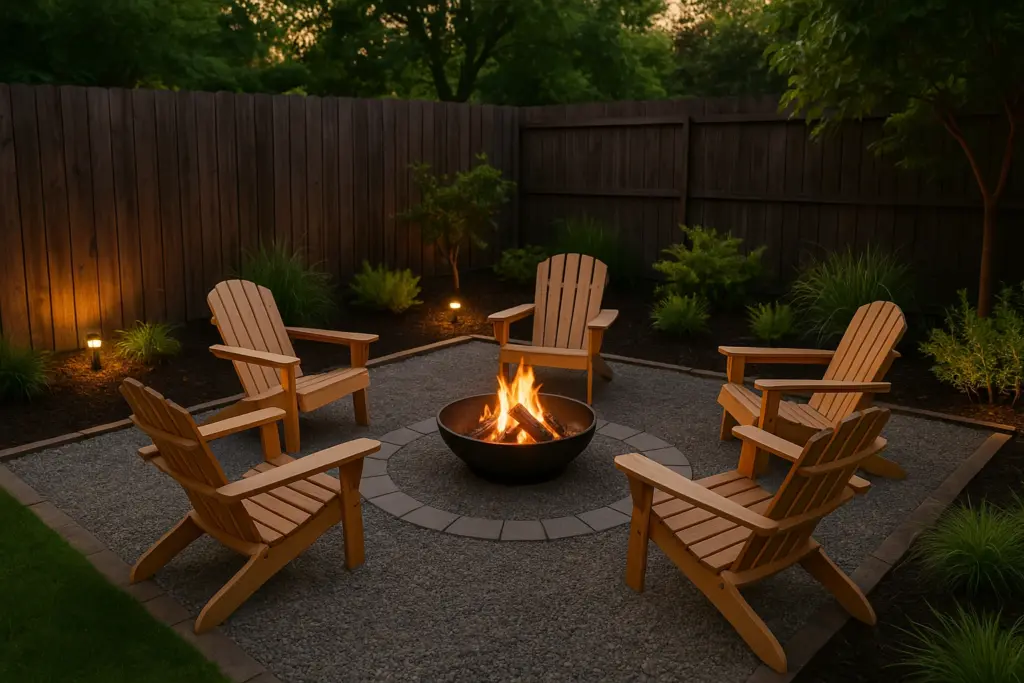
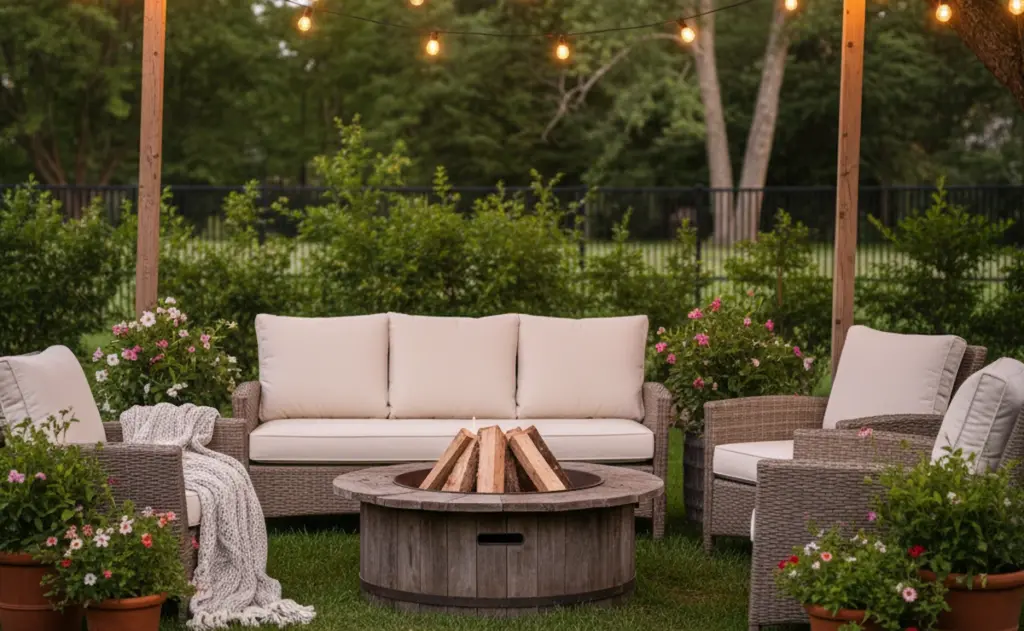
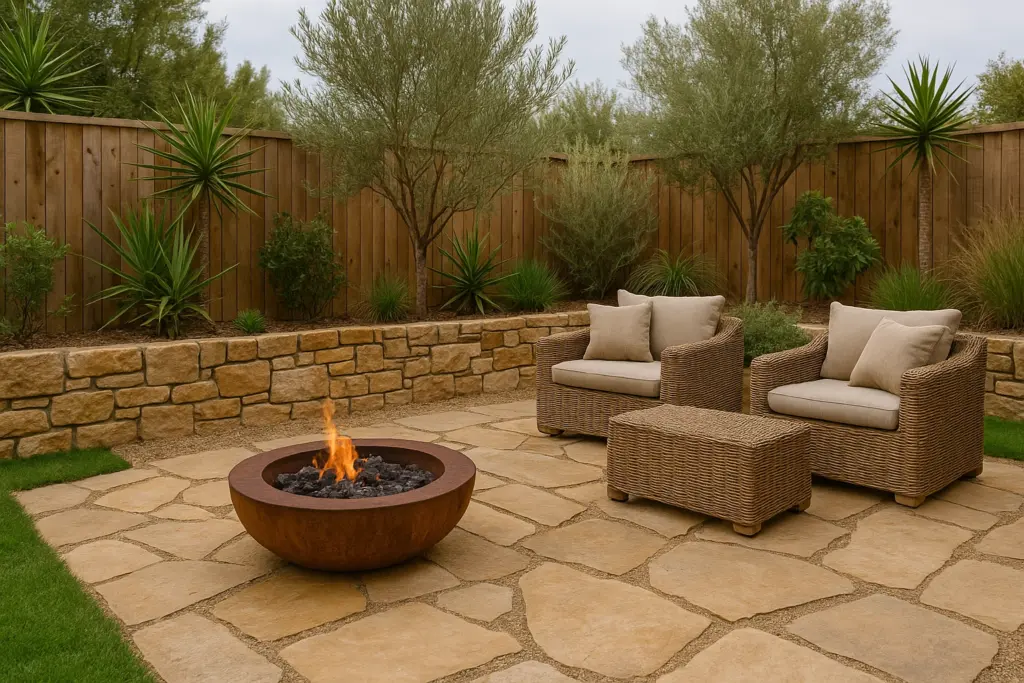
Fire Pit Zones That Don’t Need Much Prep
Another easy installation is a fire pit on gravel or pavers. It requires no digging, no permits, just a space to sit outside on cool evenings.
From our work setting these up in Brisbane backyards, most homeowners have theirs running within two to three hours. Surround it with low seating or logs, and that adds a hardscape element to your yard. This way, you can create an outdoor space for gathering without any ongoing effort.
What’s more, you can use fire pits year-round for Brisbane’s mild winter nights. They also give you a reason to use the backyard instead of just looking at it through the window.
Start With One Thing This Saturday
Low-maintenance landscaping builds up over time. You don’t need to tackle the whole yard in one weekend to see results.
These updates can save time, drop your water usage, and keep your yard looking decent without you being out there at the drop of a hat. The point is to create an area you can truly enjoy instead of something that demands constant upkeep.
If you’re planning larger outdoor changes or need a hand with landscaping that lasts, we specialise in outdoor renovations built for Brisbane’s climate. Contact us at Avalon Acres for more information.
Did you know Australian homeowners spend an average of $12,500 on backyard renovations? Fortunately, you don’t have to spend that much. A strategic plan for your backyard upgrade can cut costs in half without breaking your bank.
In fact, working within a budget results in better outdoor spaces because you skip the impulse buys that clutter your yard (and yes, we’ve all bought that decor that sits unused in the corner).
This article has everything you need to know about:
Free materials around Brisbane
Container gardening that adapts to your needs
Vertical planting solutions for tight spaces
Hardscaping elements that cost a fraction of professional installations.
By the end, you’ll know how to stretch a small budget into a garden that looks thoughtfully designed. So, let’s show you how you can be creative without spending big.
Why Budget Backyard Design Works Better
Budget backyard design forces you to prioritise important elements in your outdoor space instead of buying everything that catches your eye.
It’s because cheaper materials push you toward creative problem-solving, and that ends up giving you a more unique yard with genuine personality. Ask yourself if you need that elaborate water feature, or a comfortable seating area would serve you better?
Budget projects also let you experiment with different backyard ideas before committing to expensive permanent installations. If the container garden works great in one corner, fantastic. But if it doesn’t, you can move it next weekend without ripping up pavers or calling in contractors.
Start With What You’ve Got: Free Materials First
The best part about using salvaged materials is that they cost absolutely nothing while adding unique character to your yard. That might be fresh mulch throughout the garden beds, a simple gravel path, or a collection of potted plants that add life to a boring fence line.
Here are some ways you can save money while creating something that feels intentional:
Salvaged Bricks and Stones for Garden Borders
Old bricks from demolition sites or online marketplaces create sturdy garden bed edges at zero cost. From our experience working with Brisbane homeowners, you’d be surprised how many people give away perfectly good materials when they renovate.
You can get flat stones to scatter around your property without purchasing new paving materials. The recycled bricks and stones will add natural texture and weathered character that brand-new materials just can’t match.
Pro Tip: Check Facebook Marketplace or Gumtree on weekends, and you’ll find someone offering free bricks, pavers, or rocks they need gone.
Repurposing Leftover Pavers for Pathways
Neighbours who are renovating often give away excess pavers that can work perfectly for small garden paths through your yard. One homeowner we know collected mismatched pavers over three months and arranged them in a random pattern that looks intentionally artistic rather than like mistakes.
Those free stepping stones had that industrial charm you see in expensive landscape design magazines. The uneven edges make each piece more interesting than the uniform pavers you’d buy at Bunnings for $4 each.
Container Gardening: Affordable Landscaping Tips
You can test different layouts, move plants to follow the sun, and completely refresh your outdoor space without digging up a single thing. That flexibility alone makes this one of the most affordable landscaping tips for any yard.
Let’s look at two ways to make container gardening on a tight budget.
Mixing Pot Sizes for Visual Interest
Large pots placed behind smaller ones create depth and dimension in a compact outdoor space. The trick is grouping terracotta, ceramic, and metal containers so the varied textures make your yard feel more layered and thought-out.
And here’s the best part: rearranging those pots seasonally refreshes your yard’s appearance without spending money on new plants. It might take an afternoon, but it completely changes how the space feels.
Cheap Backyard Colour Through DIY Planters
Old tin buckets, wooden crates, and plastic containers become DIY planters once you drill drainage holes in the bottom (Brisbane’s weekend markets are gold mines for these).
When you visit thrift stores, grab anything waterproof with decent depth. Vertical stacking of planters maximises growing space. Especially when the ground area is limited or costs too much to properly landscape with planting beds and edging.
Bonus: Bright colours painted on recycled containers make cheap materials look intentional and stylish instead of looking like you’re using rubbish bins.
Vertical Planting When Ground Space Costs Too Much
Vertical planting saves money by covering large fence areas with just two or three climbing plants instead of dozens of smaller ones. When you’re working with a small yard or trying to hide an ugly fence, looking up instead of out can be the perfect solution.
Take a look at some ways you can opt for vertical planting.
Climbing Plants on Existing Fences
Simple trellises attached to tired fences can make your boring boundaries look like living green walls.
Especially, star jasmine and passionfruit vines grow quickly in Brisbane’s climate. They can cover large fence sections without needing multiple plant purchases. From a lower cost perspective, one $25 star jasmine can cover three metres of fence within a year.
Vertical gardens also save you money on landscaping because they eliminate the need for garden beds that require bags of soil, edging materials, and proper drainage setup.
Hanging Planters for Small Outdoor Space
Ceiling-mounted planters under verandahs or pergolas add greenery. And you can do that without using valuable floor space where you might want a seating area instead.
For example, stacked hanging arrangements with chains create simple layered looks using fewer individual plants overall. This also keeps your plant budget reasonable.
Bonus Idea: Herbs and succulents in hanging baskets stay accessible for cooking while keeping pathways clear and functional, so you’re not tripping over pots every time you walk through the yard.
Mulch: The Secret to a Healthier Garden
What if one $50 trailer load could make your entire yard look professionally landscaped? Sounds too good to be true? It might sound surprising, but mulch delivers outsized results for very little cost. A mulched yard is maybe $50, but the visual impact is worth thousands of dollars in perceived value.
Here’s how it can benefit your garden:
Maintained Look: A thick layer of sugar cane or wood chip mulch can make messy garden beds look professionally maintained overnight. It’s because mulch creates a clean, uniform colour across your whole yard instead of patchy dirt and weeds showing through everywhere.
Suppresses Weeds: Mulch suppresses weeds naturally, which means you’re spending less time maintaining your garden and zero money on herbicides that cost $20 a bottle. One weekend of spreading mulch saves you months of weeding work and instantly makes your landscaping look intentional.
Pro Tip: We recommend checking out Brisbane City Council programs and local tree loppers. They often provide free mulch if you’re willing to pick it up yourself, which makes it genuinely the cheapest backyard upgrade you’ll find.
Hardscaping Elements Without the Price Tag
Hardscaping elements like paths, edging, and defined spaces typically eat up the biggest chunk of landscaping budgets. But there are ways to create structure and flow in your yard using inexpensive materials that look just as good as the expensive options.
Take a look at these two budget-friendly approaches.
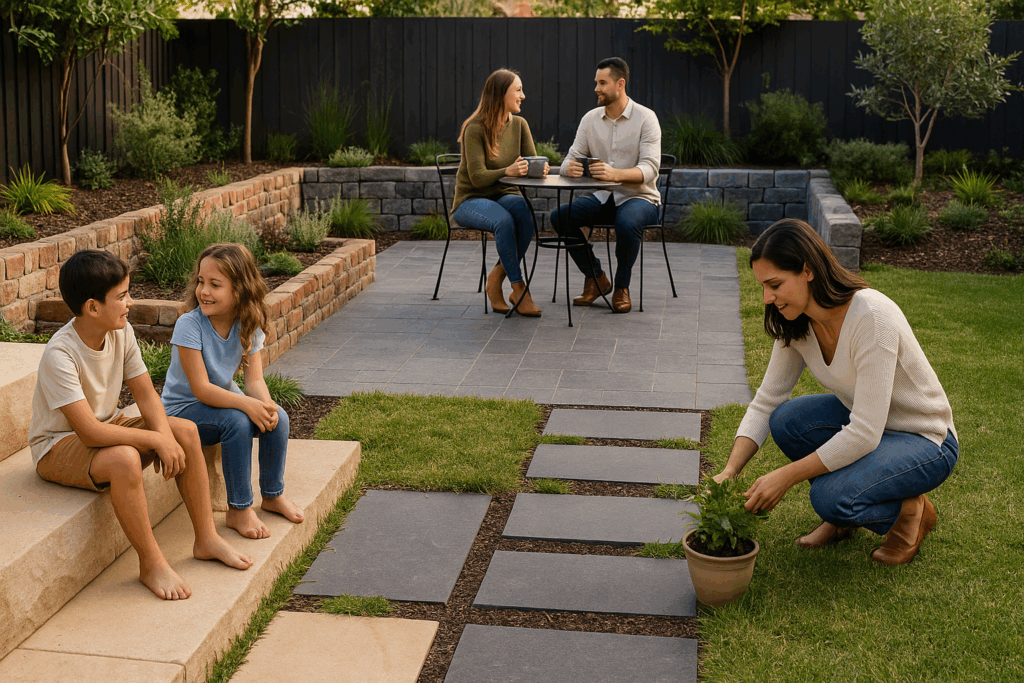
Stepping Stones vs Full Pathways
Strategically placed stepping stones guide foot traffic without expensive full-coverage paving installation. The gaps between stones allow grass or groundcovers to grow. And they create a softer look than solid concrete paths.
It’s especially helpful during Queensland’s summer storms when soggy grass paths turn into mud tracks. You can lay a functional stepping stone path in an afternoon for under $100, while a full paved path costs thousands and requires professionals.
Add Texture With Gravel and River Rocks
Gravel costs significantly less than pavers but creates defined outdoor areas just as effectively around seating areas or garden borders. One homeowner we know used river rocks grouped around garden beds and planters to add visual interest without ongoing plant care or watering costs.
If you try different stone sizes mixed together, it will create natural-looking hardscaping elements with minimal expense. A cubic metre of gravel runs about $50 delivered, while the same area in pavers would set you back $300 plus labour for installation.
Low-Maintenance Plants That Save Money
We’ve seen countless yards upgraded using kangaroo paw, lomandra, and grevillea that thrive in Brisbane summers without constant attention or replacement every few months. One established lomandra costs $12 and lasts decades, while petunias need replacing twice a year at $6 per punnet.
It’s because native Australian plants require less water and fertiliser once established. These reduce your ongoing costs significantly compared to thirsty exotic plants that struggle in Brisbane’s climate.
Which means you get to spend weekends enjoying your outdoor space instead of maintaining it, and that’s worth more than any money you’ll save.
Your Outdoor Space Deserves Better Than Excuses
Budget backyard designs we’ve suggested prove that expensive renovations aren’t necessary for creating a beautiful, functional outdoor living area. The landscaping ideas covered here focus on smart material choices and strategic planning rather than throwing money at every problem.
We suggest you start with one element, like mulching your garden beds or adding a few container plants to your front yard, then build momentum gradually as you see what works for your garden.
Our team at Avalon Acres understands Brisbane’s outdoor living potential and helps homeowners maximise every dollar spent on renovations. So if you need advice on hardscaping elements or want professional help bringing your budget landscaping project to life, visit our website.
Simple changes do more for backyard comfort than elaborate renovations most homeowners think they need. When you fix actual problems like harsh afternoon sun or nowhere decent to sit, your outdoor space gets used daily instead of sitting empty. Fancy features might look the part, but simple changes do the heavy lifting when it comes to daily comfort.
Well, that’s not all. Improving your backyard brings benefits straight to your door. You get extra living space, better home value, and options for outdoor entertaining with family and friends. To enjoy these perks, you need to make smart calls about materials, layout, and shade.
In this article, we’re covering practical backyard comfort ideas that work in Brisbane’s climate. We’ll share how to assess your outdoor area, choose quality furniture, and set up functional zones. Let’s get into the changes that actually make your patio or deck more comfortable.
What Makes a Backyard Actually Comfortable?
A comfortable backyard gives you protection from the weather, enough seating that actually feels good, and zones that suit how you spend time outside. Sounds simple enough, right?
Comfort means different things depending on your setup. Some homeowners need shade from afternoon sun, others want wind protection, while many just need better outdoor furniture that doesn’t fall apart after one season.
Your outdoor space should feel natural to use, not something you force yourself into. Think about temperature control first, then seating quality, and how easily you move between areas. When you nail these basics, creating an inviting atmosphere happens on its own.
Figure Out What Your Outdoor Space Needs First
Skipping this step means you’ll buy the wrong furniture, build shade in useless spots, and waste money fixing problems you didn’t need to create. Every yard works differently based on sun patterns, wind, and how you actually use the outdoor space.
Before you spend a dollar on your patio or deck, map out what’s already happening in your backyard. Note where the heat hits hardest, which areas feel exposed to wind, and where you’d naturally want to sit. This saves you from guessing and helps you work within your budget.
Track Where Sun and Wind Hit Throughout the Day
Morning sun might be pleasant, but western afternoon heat makes areas unusable in summer (that Instagram-worthy setup looked great for exactly two weekends). Wind tunnels between houses can ruin outdoor dining, even on nice days.
Note these patterns before buying furniture or building permanent structures. Spend a weekend watching how elements move through your yard at different times. What feels comfortable at 8 am might be unbearable by 3 pm.
How You’ll Really Use the Area
Weekly barbies need different setups than quiet morning coffee spots or kids’ play zones. Consider how many people you typically host and what activities happen most often in your outdoor entertaining space.
Don’t design for imaginary dinner parties if you mostly want solo reading time. Be honest about whether you need a full outdoor dining table or just a couple of comfortable benches. Your family’s actual habits should guide every decision you make.
Materials That Stand Up to Queensland Weather
Ever bought outdoor furniture that looked perfect in the store but fell apart after one Brisbane summer? Why does this even matter? Because replacing cheap furniture every season will hit you where it hurts.
Here’s a quick breakdown of what actually holds up in our climate:
Material
Why It Works in Queensland
Treated hardwood
Handles humidity and resists rot with yearly oiling
Aluminium frames
Won’t rust in coastal or stormy conditions
Powder-coated steel
Tough finish that holds up against rain and sun
Weather-resistant fabric
Dries fast after storms and won’t fade under UV
Quality resin or plastic
Low maintenance and won’t crack in the heat
Now, you’re probably thinking this sounds expensive. Not always. Budget-friendly doesn’t mean buying the cheapest option. It means choosing materials that won’t cost you double when they need replacing in twelve months.
Take treated pine as an example. It looks great at first, but it needs yearly oiling to handle Brisbane’s humidity (timber and Brisbane storms have a complicated relationship).
If you want something lower maintenance, aluminium and powder-coated steel resist rust far better than cheaper metals. Spending a bit more upfront on quality ensures longevity for your outdoor space, so you’re not back at Bunnings next summer buying the same chairs again.
Set Up Zones for Outdoor Entertaining and Downtime
The best outdoor living spaces work because they separate activities. One person reading doesn’t interrupt another person cooking. One group chatting doesn’t block the kids running around. When you create distinct zones in your outdoor entertaining space, the whole area becomes a more usable space for everyone.
Getting zones right the first time means you won’t need to move heaven and earth later. Think about where activities naturally happen and build around that.
Your Outdoor Dining Area Sorted
Place your outdoor dining area close to your kitchen door. This makes serving food practical instead of a workout. Allow at least 1.5 metres around tables so people can move chairs without bumping walls or railings.
We’ve renovated backyards across Paddington and Ascot, and the dining zones that get used most are always within five steps of the back door. Once you’ve sorted the location, think about overhead cover on your patio or deck. It helps when unexpected afternoon storms roll through Brisbane.
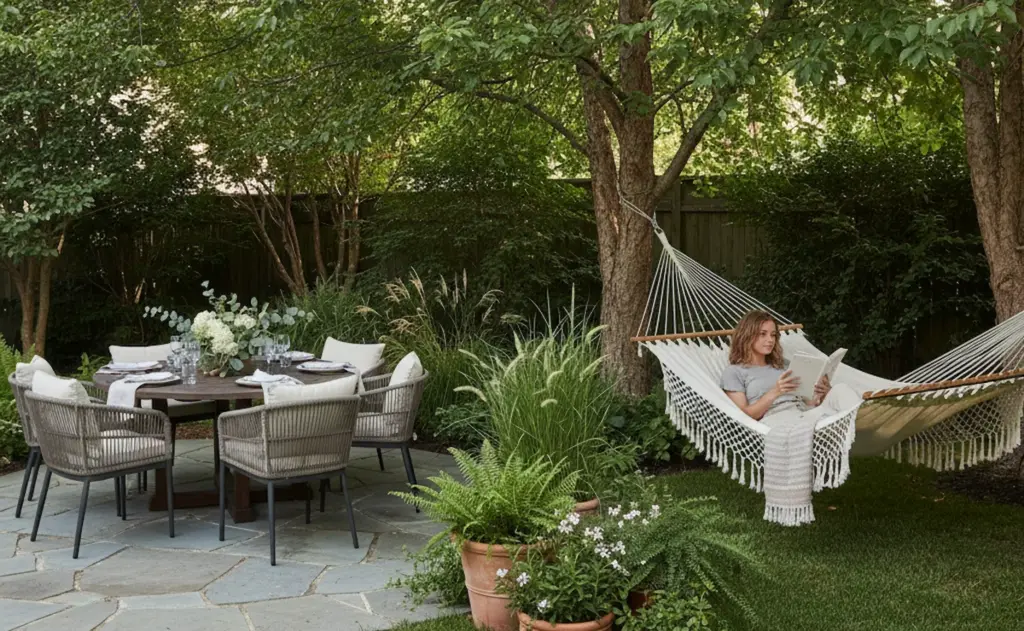
Lounging Spots for Any Season
Corner spots with two walls just feel more protected and comfortable than open areas. So when you’re choosing where to place lounging furniture, keep it away from main pathways where kids and pets constantly move through.
For winter warmth, morning sun positions are perfect. During summer, shaded eastern spots on your patio give you relief from the heat. This simple switch extends how much of the year you actually use your outdoor living space.
Outdoor Kitchen Basics: Keep It Straightforward
Most outdoor kitchens end up as expensive barbecue stations because people overplan and undercook the basics. The thing is, you don’t need a full commercial setup to host gatherings in your backyard.
Our clients in Chapel Hill and Indooroopilly who kept their outdoor kitchen simple still use them weekly, three years later. The ones who went all out? Many barely touch theirs now.
Here’s what actually gets used:
Bench space: A decent prep area near your grill makes cooking easier without running inside constantly.
Weatherproof storage: Keep utensils and plates outside so you’re not carrying everything back and forth.
Quality grill: If a built-in barbecue isn’t your cup of tea, a portable option works just as well for most families.
Start budget-friendly and add features once you know how you use the space. You can always upgrade later, but you can’t get back the thousands spent on things you never touch.
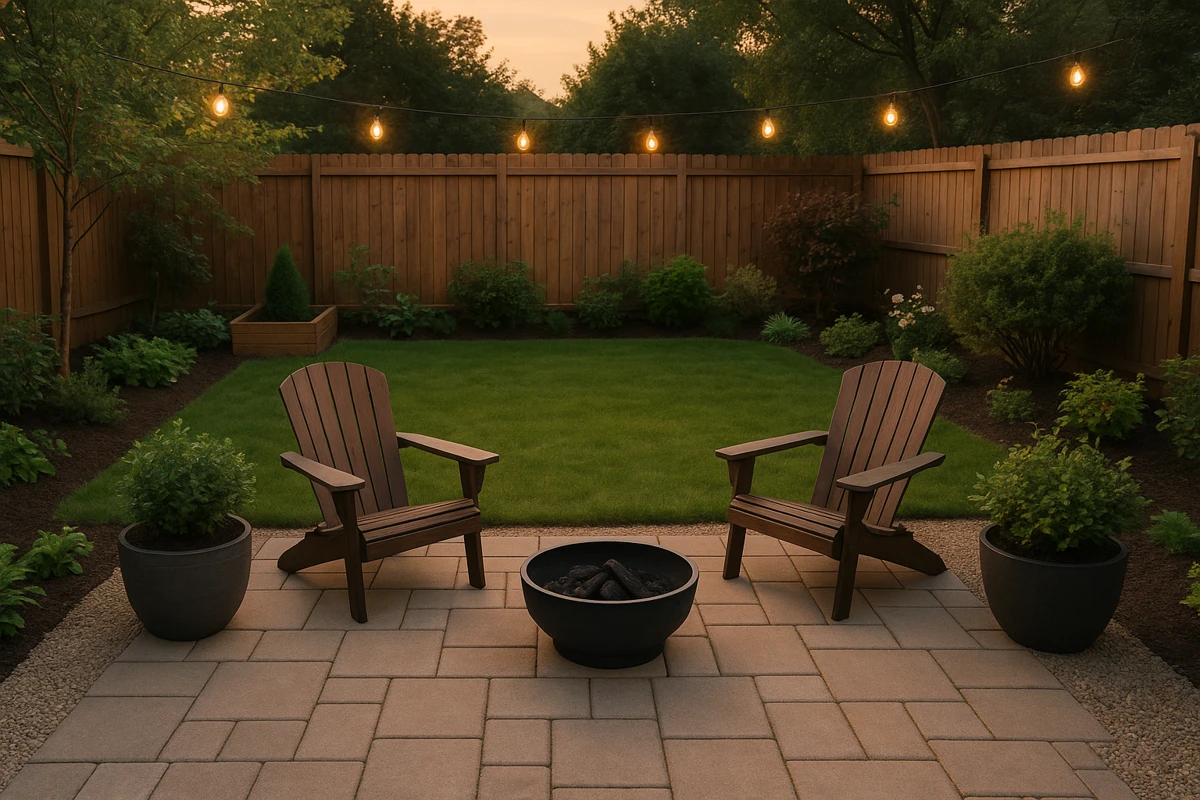
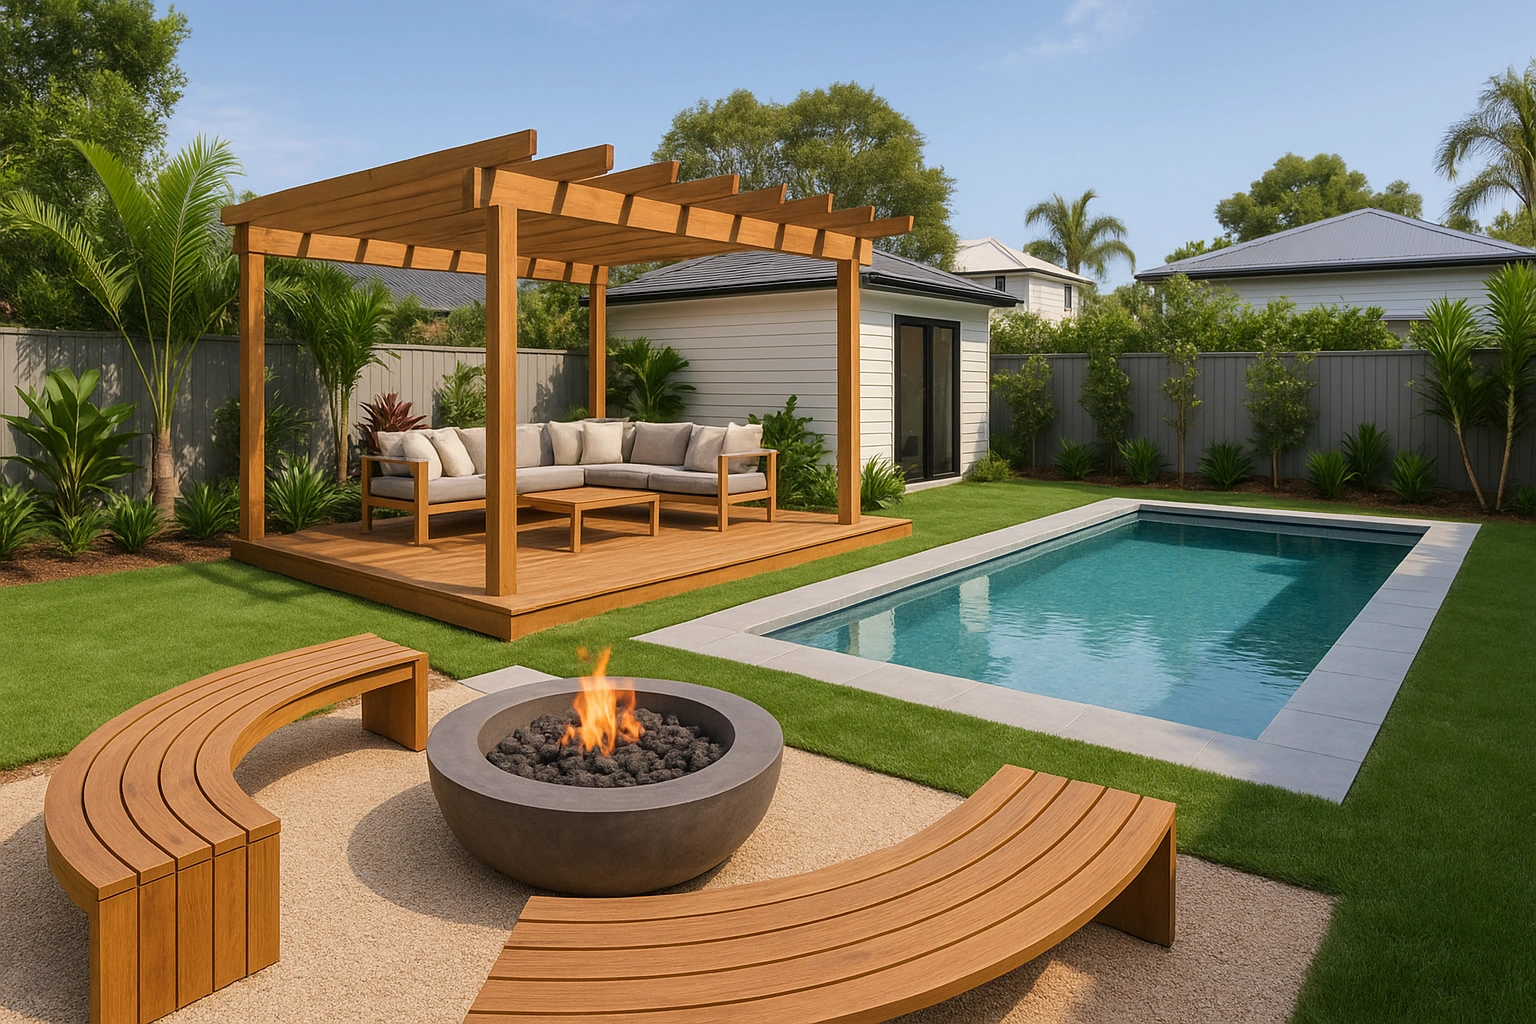
Where to Put a Fire Pit (And Where Not To)
A fire pit can turn your backyard into the favourite hangout spot during cooler months. But put it in the wrong place, and it becomes a hazard nobody wants to sit near.
Before you dig or buy, keep these in mind:
Clearance: Fire pits need at least 3 metres from fences, overhangs, and trees that drop leaves. This buffer zone keeps sparks from landing on anything flammable. The last thing you want is embers drifting onto your neighbour’s fence or your own deck.
Wind direction: Pay attention to how the wind moves through your yard before locking in a spot. Position your fire pit where smoke won’t blow directly into house windows or your neighbour’s washing line (nobody wants to be that household on the street). A quick test on a breezy evening saves you from relocating later.
Local regulations: Check your council rules first. Brisbane has specific guidelines about open flames in residential areas, and some suburbs have stricter requirements than others. Getting this sorted early avoids fines or having to rip out what you’ve built.
Safety style: Sunken or bordered fire pits are safer around kids than raised portable versions. The edges keep little ones from accidentally stepping too close, and the contained design holds coals better if someone bumps into it.
So, the takeaway from this part of the article is simple. A fire pit makes a brilliant focal point for your backyard, but only when it’s placed where everyone can relax without worrying.
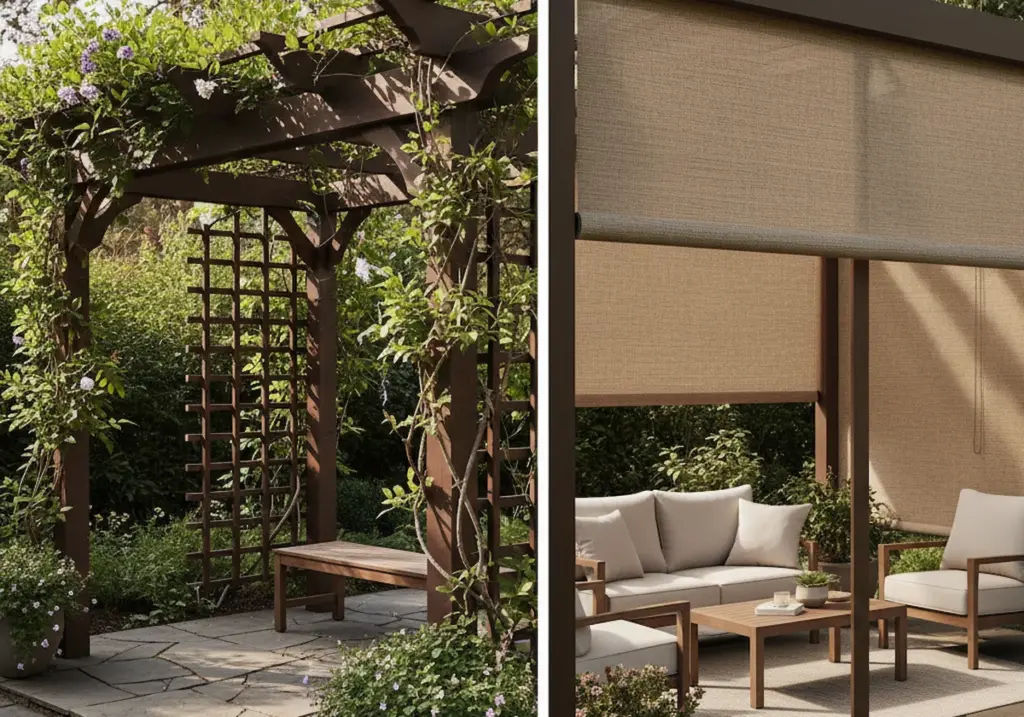
Outdoor Blinds or Pergola: Which One Fits?
Now that you’ve sorted shade options, you might be wondering whether outdoor blinds or a pergola makes more sense for your setup.
Outdoor blinds cost less upfront and give you rain and wind protection almost instantly. You can roll them down when a storm blows through and roll them up when you want open air. They work well on existing patios or decks without major construction.
Pergolas take longer to build and cost more, but they add permanent structure to your outdoor area. They also boost property value because buyers see them as a solid feature rather than an add-on. If you’re planning to sell in a few years, a pergola can become a real selling point.
So which one fits? Your choice comes down to whether you want flexibility or a fixed architectural feature. If the budget is tight right now, outdoor blinds let you enhance your space without a big commitment. If you’re after something that lifts your home’s architecture long term, a pergola is worth the investment.
Quick Fixes That Actually Lift Home Value
Small outdoor improvements return some of the highest value when you sell, often paying for themselves plus extra. The numbers don’t lie on this one.
Potential buyers notice curb appeal before they even step inside. And what shapes that first impression? A tidy front yard with fresh landscaping tells them the property has been looked after. Simple things like trimmed trees, healthy flower beds, and a few potted plants near the entrance all add to that instant visual appeal.
Your backyard sells the lifestyle. Prospective buyers in Brisbane want to see year-round outdoor entertaining potential when house hunting. A defined outdoor dining space, decent lighting, and a well-maintained patio or deck photograph well for listings and make a big impact during inspections.
You don’t need to spend thousands either. A fresh coat of paint on tired fences, some new garden beds, and budget-friendly lighting upgrades go a long way. Even adding a small water feature or a couple of benches creates visual interest that catches a buyer’s eye.
These quick fixes become a real selling point because they show the home is move-in ready. When potential buyers can picture themselves hosting friends out the back, you’ve already won half the battle.
Turn Your Outdoor Living Space Into Something You’ll Use
These backyard comfort ideas work because they focus on solving real problems like weather exposure, poor layout, and materials that don’t last. You don’t need a complete overhaul to make your outdoor area more comfortable. Start with the changes that fix your biggest frustration, whether that’s a lack of shade or nowhere to sit properly.
Small upgrades add up faster than waiting for the perfect renovation budget. A few smart decisions about your patio, deck, or garden can turn an ignored space into a captivating retreat you actually want to spend time in.
If you’re ready to transform your backyard into something your family will use year-round, Avalon Acres can help. We specialise in outdoor renovations across Brisbane that suit how you live, not just how things look. Check out our work and see what’s possible for your outdoor living space.
These days, outdoor living trends feature three things: making spaces comfortable, connecting with nature, and choosing materials that last.
That’s why a backyard renovation in Brisbane looks different now than it did a few years ago. People want outdoor spaces that work just like their indoor rooms.
This guide will walk you through what’s popular in outdoor design right now. You’ll also learn how to make your outdoor spaces blend naturally with your home’s style.
Let’s begin with the trends.
Popular Backyard Design Ideas for Brisbane Homes
The patterns are pretty clear when you look at what’s popular. Today’s outdoor spaces need to feel natural, support relaxation, and make entertaining easy.
Take a closer look at these trends and see what fits your space.
Natural materials and earthy tones
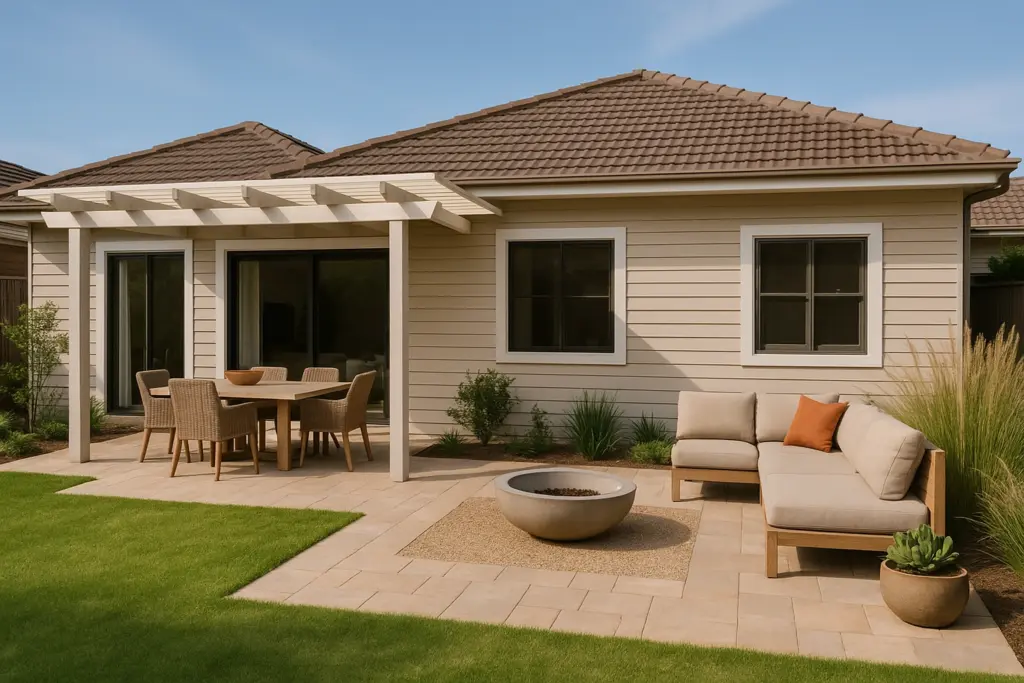
Stone, timber, and raw textures are showing up in nearly every Brisbane backyard project these days. There’s a good reason for this: these materials handle our climate well and actually look better as they age.
The colour choices also follow a similar pattern. For instance, warm terracotta, sandy beige, and deep charcoal create a relaxed, earthy backdrop that lets your plants shine without competing for attention. Better yet, natural materials pair perfectly with Brisbane’s green surroundings instead of clashing with them.
Alfresco entertaining zones
Outdoor kitchens have gone from fancy extras to standard features in most renovations. This Alfresco trend has Brisbane families investing in proper outdoor cooking setups (no more simple barbecue tucked in the corner).
Along with kitchens, fire pits bring warmth on cooler nights, and shaded dining spots mean you can use the area all year.
Seamless flow between indoors and outdoors
Now, the best designs make it hard to spot where your house stops and your garden starts. You can achieve this with matching floor materials, wide sliding doors, and colour schemes that carry through both areas. If you do it right, it will genuinely feel like your living space just got twice as big.
Smart systems for comfort and sustainability
Today’s gardens use clever, unobtrusive technology, like automated irrigation that saves water and time, and quality LED lights that provide a soft, gentle glow after sunset. These upgrades make daily life easier while helping you make sustainable choices.
Wellness gardens and mindful outdoor design
Now, something interesting is happening with garden design lately. More people are thinking about mental health alongside how things look, like using quiet seating areas, native plants, and natural sounds to create spaces to decompress.
We’ve also noticed an uptick in clients specifically asking for peaceful zones where they can switch off from the day.
Now that you know what’s trending, let’s see how you can make it happen.
Brisbane Landscaping Services for Thoughtful Backyard Renovations
A proper backyard renovation in Brisbane needs careful planning, realistic budgets, and a team that actually knows the local area. Often, the difference between a space you love and one that disappoints comes down to planning well from the very start.
So what does smart planning really look like?
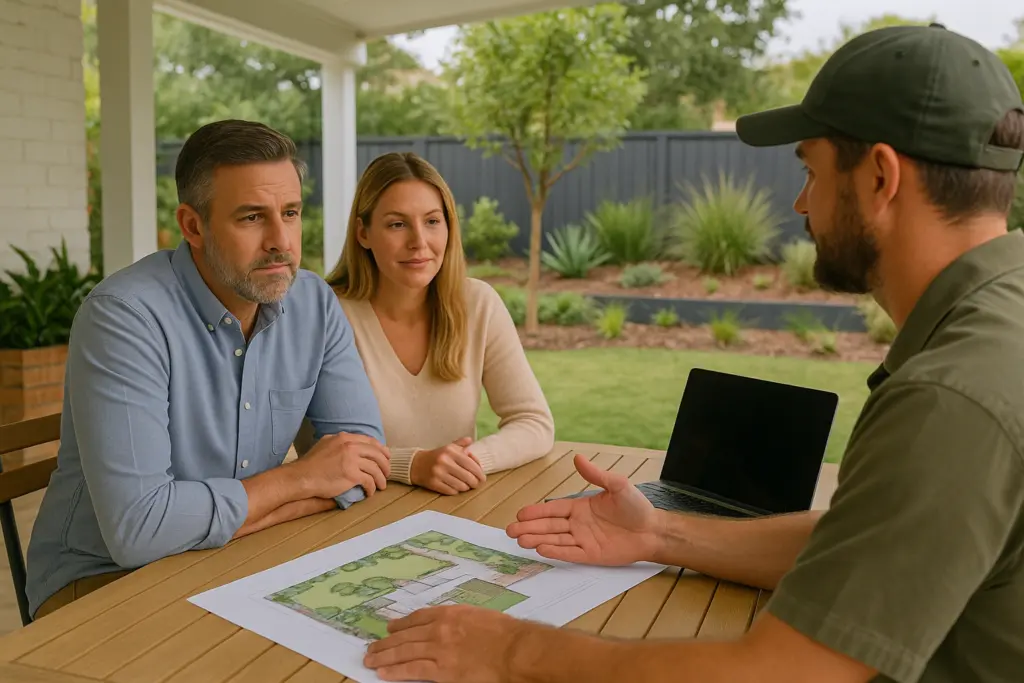
What to expect from your initial consultation
Your first meeting with landscaping services can set everything up for success (…or failure).
A good team will ask how you live, what you want from the space, and which styles appeal to you. They’ll also look at practical stuff like drainage, where the sun hits, and how easy the site is to access. These early conversations help you dodge expensive mistakes down the track.
Smart phasing prevents costly mistakes
Once you’ve talked through your vision, your next step is figuring out the right order to do things. Don’t rush into the project without a clear order.
We recommend starting with the big structural work first, like retaining walls, paving, and major garden beds. Doing this will create a solid foundation before moving on to smaller details. Then you can move on to planting and finishing touches to avoid having to redo work underneath.
Budgeting for backyard renovation in Brisbane
Phasing also helps with another big question that most people have: cost. Most projects fall somewhere between $5,000 for basic updates and $50,000 or more for full makeovers. But the final amount depends on your budget and choices, like:
Smaller budgets cover fresh plants and some new paving.
Mid-range jobs add things like outdoor kitchens or areas around pools.
Premium builds give you multiple zones, quality products, and custom features throughout the whole space.
We recommend starting with essential structures, then adding optional features as funds allow.
How should outdoor design match your home?
Whatever your budget, there’s one rule for every project: your outdoor areas need to feel like they belong with your house.
Would a sleek modern home suit a dense cottage garden out front? Not really. The same goes the other way around. Modern materials work with modern buildings, while traditional homes pair better with classic garden styles. If the colours, textures, and overall feel flow naturally from inside to outside, everything just clicks.
Start Your Backyard Renovation with Brisbane’s Trusted Landscaping Team
So there you have it.
2025 is shaping up as the year when outdoor living really takes centre stage in Brisbane homes. The trends we’ve covered show that backyards are proper lifestyle areas that change how you actually live day to day.
If you’re tired of settling for a yard that doesn’t work for you, Avalon Acres can help you move forward. Book a relaxed initial consultation where you can share your ideas and see what’s realistic for your space.
Don’t let another summer slip by with outdoor areas that leave you feeling flat. Your backyard has serious potential just waiting to happen, and honestly, the best time to start is now.
Walk through any Australian suburb and you’ll notice most backyards look identical. This happens when you choose materials that don’t tell your story. That’s why thoughtful material selection is so important!
Natural material backyard design builds outdoor spaces that really show who you are, your values, and your lifestyle. This approach builds outdoor areas that present your property as a true reflection of your family’s character.
In this guide, we’ll look at good ways to use stone, timber, and natural materials well. You’ll learn why natural materials last long and look good. You’ll also find easy ways to change any space into something that’s yours.
Read on to learn more about creating outdoor spaces that truly reflect who you are.
Stone Speaks Your Language
Think of natural stone selection like choosing an outfit. Each type sends a different message about who you are and how you live.
Your stone personality guide works like this:
The Beachside Relaxer: Sandstone works great for families who love that relaxed feeling. It has natural textures and warm, earthy colours that fit well with Australian landscapes.
The Modern Minimalist: Why pick Granite material? This stone suits homeowners who like sleek, modern style. Most importantly, granite has bold patterns and shiny finishes that make clean lines in outdoor areas.
The Heritage Lover: Using recycled brick materials, you can tell stories of history while adding rustic character to garden beds, retaining walls, and landscape features that reduce environmental impact.
The Sophisticated Designer: Fancy homeowners love Bluestone. Because the stone offers nice colours and long-lasting strength for walls and paths.
Beyond looking good, these natural stones offer real environmental benefits. For instance, Australian studies show that sustainable materials can cut carbon by up to 33% compared to normal building materials.
Timber: Where Warmth Meets Function
Nothing beats timber for creating cosy outdoor spaces where families actually want to spend time together. The reason is simple. Wood brings natural warmth that makes any outdoor area feel more inviting and comfortable.
Follow this quick process for timber success:
Check your local climate patterns:High rainfall areas need different timber than dry regions. So, consider humidity levels and temperature changes in your outdoor space.
Match timber type to usage: Heavy-traffic areas need hardwood decking materials. For lighter applications, decorative screens work well with lighter sustainable timber options for garden design features.
Budget for ongoing care: Factor in oiling, staining, or sealing costs over time. Keep in mind that some sustainable timber needs yearly maintenance while others last for years between treatments.
Research sustainable sources: Plantation timber supports responsible forestry practices. When shopping, look for certified wood that reduces environmental impact and waste in your outdoor living spaces.
Based on our experience, spotted gum and blackbutt wood handle Australian conditions beautifully. These native timber materials age gracefully and need minimal maintenance.
Native Plants and Natural Harmony
Australian native plants work great with stone and timber in any garden design. Plants like wattle, native grasses, and kangaroo paw look good with recycled bricks and natural stone. If you choose eucalyptus, pick dwarf or compact varieties suitable for garden settings, as some species can dominate small spaces and affect nearby plants. These plants grow well in local areas without extra watering.
Native plants are special because they fit well with the local environment and weather. They bring local wildlife like birds and butterflies while needing less care than other plants. You can also use organic mulch to help these plants stay healthy while stopping weeds.
Sustainable landscaping works best when you mix native plants with eco-friendly materials and natural features. This combination makes outdoor spaces that fit well with the natural landscape around your property. The result is a low-maintenance garden that helps both your lifestyle and the environment.
Time-Saving Choices for Busy Lifestyles
Modern families need outdoor spaces that look great without demanding constant maintenance and attention. Life gets busy, and your backyard should make things easier, not harder.
These three strategies will revolutionise your outdoor maintenance routine:
Materials That Work Harder
Long-lasting materials like natural stone, quality timber, and recycled bricks require minimal ongoing care. The reason they work so well is very clear. These sustainable choices age gracefully while reducing landfill waste.
You should choose materials that handle weather changes without frequent repairs or replacements. This means low-maintenance options give you more time for family activities.
Environmental Impact That Actually Matters
Low-maintenance landscaping reduces environmental impact through effective material choices and efficient design.
For example, drought-tolerant plants, permeable surfaces, and recycled materials create cost-effective solutions. Better yet, sustainable approaches save time, money, and help protect the local environment while supporting native wildlife.
Design Features That Save Time
Start with automatic watering systems for garden beds. They handle the daily watering, so you don’t have to. Next, choose ground cover plants that stop weeds from growing. This cuts down your weeding time significantly.
Natural stone walls are another wise choice. It’s because these walls need much less care than painted surfaces. Finally, consider water features with pumps. They need little maintenance while making your outdoor space look great.
The best outdoor spaces combine beauty with practicality. When you choose easy-care materials and design features, you create more time for enjoying your backyard instead of working in it.
Bringing Your Vision to Life
Many Australian homeowners struggle with generic backyards that don’t reflect their personality or lifestyle. Natural materials offer the perfect solution to create meaningful outdoor spaces that truly represent who you are.
We’ve explored how stone, timber, and native plants work together to tell your unique story. Time-saving design choices help busy families enjoy beautiful, low-maintenance gardens that support both lifestyle and environmental goals.
Ready to upgrade your backyard into something extraordinary? Contact us today and see how we can bring your vision to life.
Many Australian families feel their backyard sits empty once the sun goes down. The thing is, you’ve put good money into this outdoor living space. But then darkness arrives and cuts your outdoor night living enjoyment short every evening.
We’re here to give you relief from this problem. Here, you’ll learn how to create a backyard that works around the clock. Your outdoor space can become the heart of family gatherings and friendly get-togethers, even after sunset.
This guide covers:
Smart lighting strategies that create ambience
Fire features that draw people together
Moon garden plants that glow in darkness
Functional furniture for evening comfort
Ready to learn more? Let’s break down everything about creating your perfect nighttime outdoor paradise.
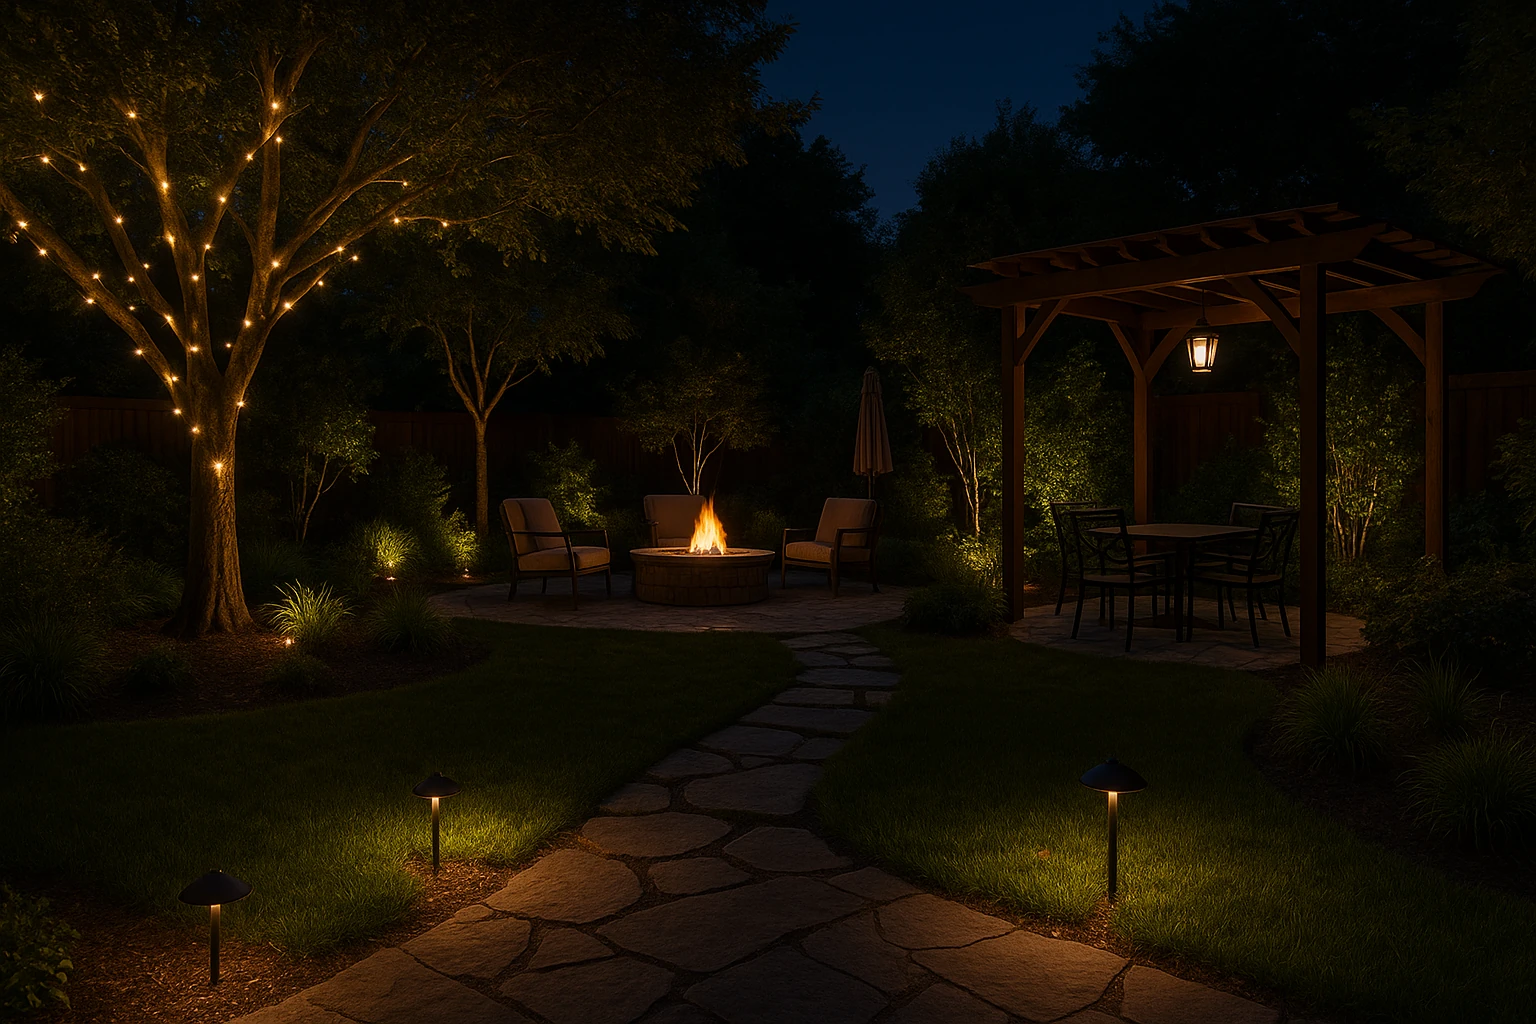
Creating Atmosphere with Strategic Lighting
Proper lighting design creates the perfect backyard ambience for evening entertainment. Let’s break down the lighting types that create the most inviting evening atmosphere:
String Lights for Instant Warmth
Outdoor string lights hung at different heights add instant charm to any space. Plus, fairy lights woven through plants create magical sparkle points that guests love.
Another interesting fact is that solar lights are an eco-friendly option that charge themselves during daylight hours. The warm glow from string lights costs less to run than traditional electrical options, too.
Quick fact: Edison bulb string lights provide vintage appeal, while LED versions last up to 25 times longer than regular bulbs and stay cool to the touch.
Safe and Stylish Pathway Options
Most accidents happen when people can’t see where they’re walking. So, you have to install garden lights to keep everyone safe while looking great at the same time.
Another favourite night light is lanterns. We recommend you space those lanterns along your garden paths to create warm, welcoming glow zones. Even better, take it a step further by picking colours and styles that match your home’s existing features for a cohesive look.
What’s more, low-voltage pathway lights consume 80% less energy than standard fixtures and eliminate the risk of electrical shock in wet conditions.
Spotlight Your Best Features
Why hide your favourite trees, sculptures, or flower beds after dark? Accent lighting shows off these special elements beautifully. The layered lighting approach prevents harsh artificial light from washing out your garden’s natural beauty. You can also highlight different areas for different seasons.
One of our clients noticed that uplighting trees creates dramatic shadows, while downlighting from above mimics natural moonlight for a softer, more romantic feel.
That means the right combination of lighting types gives you control over your backyard’s evening mood and functionality.
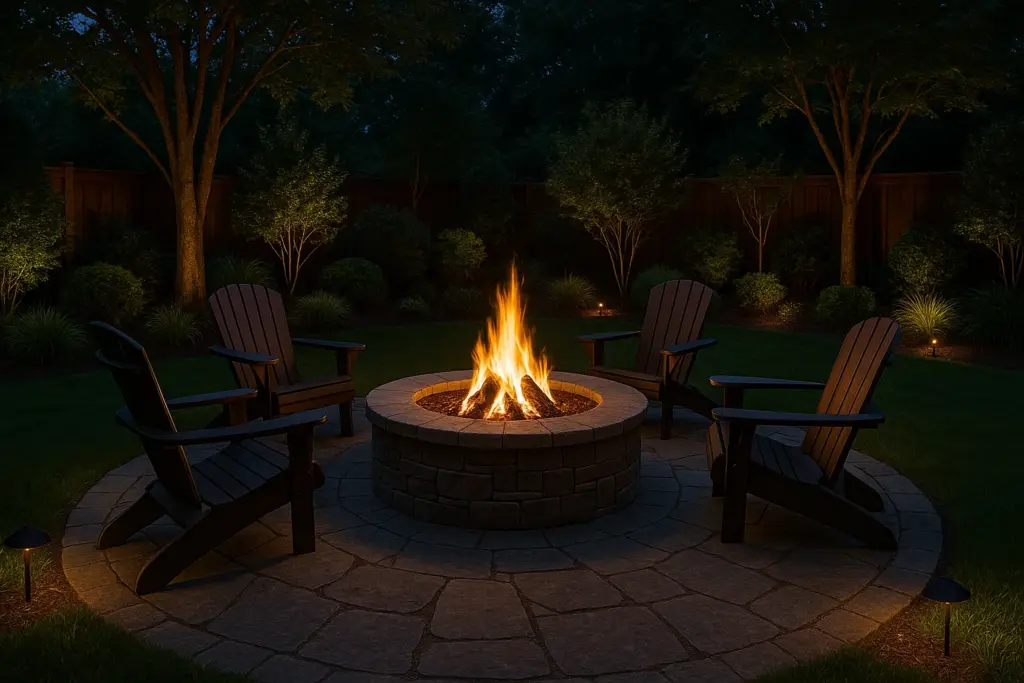
Fire Pit Zones: The Heart of Evening Entertainment
Nothing beats the cozy appeal of a well-planned fire pit area. The thing is, getting it right takes a bit of planning. Let’s cover the practical steps that turn any backyard corner into an entertaining hub:
Proper placement: Position your fire pit 3 metres away from fences, trees, and outdoor furniture. Also, level ground works best and prevents water pooling issues while meeting local council fire safety regulations for Brisbane homes.
Circle seating: Most successful fire pit areas feature chairs arranged around the entire perimeter rather than just one side. So, everyone receives equal warmth distribution and naturally participates in the conversation.
Material selection: Steel fire pits heat up fast but lose warmth quickly compared to stone or brick alternatives. On the other hand, stone varieties hold heat for hours longer, which is perfect for extended evening gatherings when temperatures drop during the winter months.
Safety prep: Another commonly shared recommendation among backyard designers is to position your garden hoses within 10 metres and store fire tools nearby. Plus, a metal cover helps you end the fire safely when guests head home, preventing overnight ember risks.
Believe it or not, your fire pit zone will become the favourite gathering spot for family and friends throughout every season.
Moon Garden Magic: Plants That Shine After Sunset
Moon gardens come alive when darkness falls across your backyard. The secret lies in choosing plants with white flowers and silver foliage that catch moonlight beautifully.
For example, white jasmine releases intoxicating fragrance during evening hours, while white roses glow like lanterns against dark green leaves. Meanwhile, silver-leafed plants like dusty miller and lamb’s ear create stunning contrast even on cloudy nights.
Fragrant night-blooming flowers add another magical layer to your moon garden design. Four o’clocks open their white blooms precisely at sunset, and moonflowers unfurl their large petals as darkness deepens. What’s better is placing these beauties near seating areas where family and guests can enjoy their evening perfume.
Layout planning makes your moon garden shine brightest. If you want, we suggest you group white flowers in clusters rather than scattered singles for maximum visual impact.
Also, place taller white plants at the back, with shorter silver varieties in front. Your moon garden will become a glowing beacon that draws people outside after sunset.
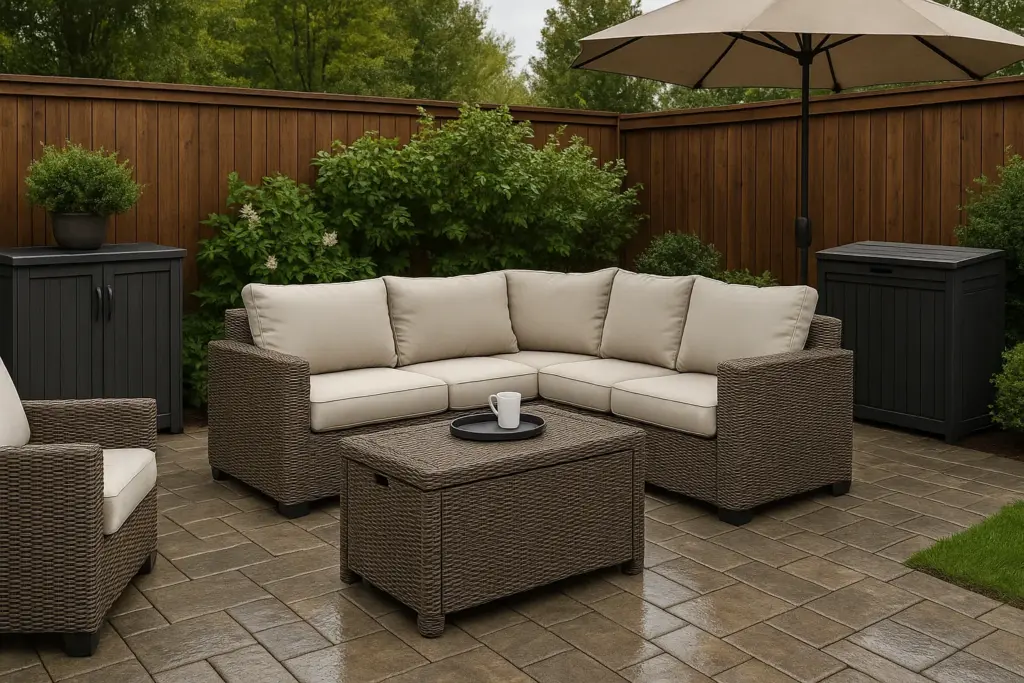
Weather-Ready Furniture and Storage Solutions
Evening entertainment requires furniture that really works when temperatures drop and dew starts forming. All-weather materials like teak, aluminium, and synthetic rattan handle moisture without warping or cracking over time.
Better yet, quality outdoor cushions made from solution-dyed fabrics resist water damage and maintain their colour through countless seasons.
A good storage keeps everything you need close at hand without cluttering your space. For example, deck boxes positioned around your patio store blankets, games, and entertaining supplies in weatherproof compartments.
What’s even better is that ottoman storage pieces work double duty as extra seating when more guests arrive unexpectedly.
Now, creating distinct zones helps you maximise your outdoor living space for different activities. For instance, designate one area for adult conversation with comfortable seating arranged around a focal point like a fire feature.
Then, set aside another section where kids can play safely under supervision while parents relax nearby.
Each zone serves different family needs while maintaining the overall flow of your backyard design. Get these functional elements right, and your outdoor living space becomes the go-to spot for evening entertainment all year round.
Bringing It All Together: Your Night Owl Paradise
A great idea starts with seeing how all these elements connect in your outdoor space. Begin with strategic lighting as your foundation, then build your fire pit area as the natural gathering hub. Add moon garden plants for visual interest and select weather-ready furniture that complements your overall design vision.
Regular upkeep ensures your night paradise stays beautiful year after year. For example, solar lights need monthly battery checks, while fairy lights require occasional bulb replacements to maintain their magical glow.
Once everything works together, Brisbane families discover new possibilities when their backyard works after sunset, too.
We’re Avalon Acres, Brisbane’s backyard renovation specialists who change ordinary spaces into year-round living areas. Contact us or visit avalon-acres.com to create your perfect nighttime outdoor paradise!
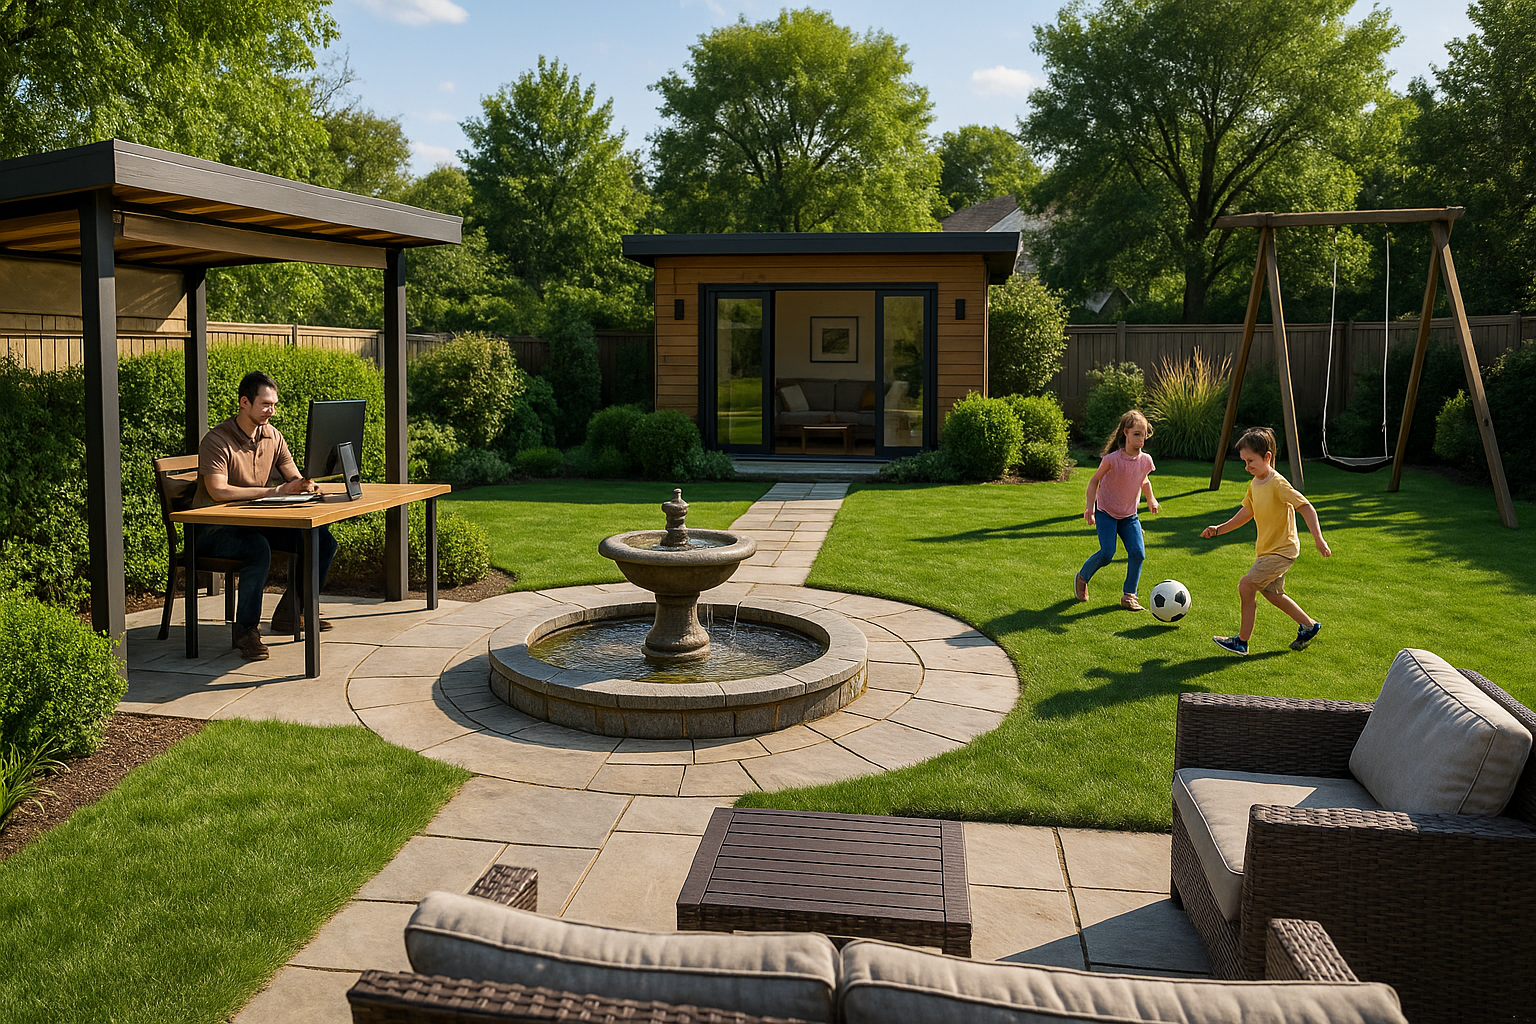
If your backyard is just sitting there growing weeds while you’re cramped inside working from the kitchen table, you’re missing huge potential. Your outdoor space can become a productive home office by morning, active play zone by afternoon, and entertainment area by evening.
In this guide, we’ll break down multi-use backyard design into simple steps. You’ll know exactly how to upgrade your outdoor space into a productive, family-friendly haven that works around the clock.
We’ll cover:
How to set up an outdoor home office
Multi-functional garden rooms on any budget
Design tricks for spaces that do it all
Water features with a genuine purpose
Seasonal solutions for year-round use
We’ve helped dozens of Brisbane families redesign their backyards using these same methods.
Read on to learn more about how to create multi-functional outdoor spaces the right way.
Why Multi-Use Backyard Design Changes Everything for Brisbane Families
Multi-use backyard design changes everything because it changes wasted outdoor space into productive, profitable areas that serve your entire family’s needs. The reality is, most backyards are pretty boring and underused. What makes this even more striking is that the Australian Institute of Health and Welfare found that 88% of Australian workers want to work from home at least some of the time. That’s a lot of people needing flexible outdoor spaces, isn’t it?
Well-planned multi-use backyard design gives you:
Massive savings on separate spaces: One flexible garden room costs way less than building a home office, kids’ play area, and entertainment room separately. Our team has helped families save more than $30,000 by choosing one well-designed multi-functional space instead of three separate projects.
Happy families with less arguing: When everyone’s needs are met with one clever design, the stress drops and the enjoyment begins. Instead of chaos, kids aren’t fighting over indoor space, parents get their quiet work pod, and everyone has room to relax in the garden.
Actual year-round backyard use: Brisbane’s climate makes your investment usable year-round, not just on weekends. That kind of reliability makes your outdoor space a proper extension of your house.
Our clients tell us the same thing. As soon as they start using their outdoor space more frequently, their overall family life gets much better.
Setting Up Your Home Office in the Great Outdoors
You can absolutely set up a productive home office outdoors with the right planning and setup. An outdoor office sounds like a dream until reality hits. What about the heat, the rain, the glare on your laptop screen? Don’t worry, we’ve got this sorted.
Here’s your step-by-step outdoor office setup that works perfectly:
Step 1: Choose Your Spot Wisely
Morning eastern light is your friend, afternoon western sun is not. So, you’ll want to find that sweet spot with natural shade options and protection from Brisbane’s unpredictable weather.
Step 2: Weather Protection That Works
Choose adjustable covers instead of fixed ones. This way, roll-up awnings and blinds protect you from rain and harsh sun. When the weather’s nice, you can open them up completely.
Step 3: Power and Connectivity Solutions
You need weatherproof power points for your outdoor home office. They keep your equipment safe from rain and moisture. As for internet connectivity, a wi-fi booster costs very little and stops those annoying dropouts.
Take Marcus from Teneriffe as a perfect example. He swapped his stuffy spare room for an outdoor setup under a simple pergola. This clever switch meant his stress levels dropped and creativity soared.
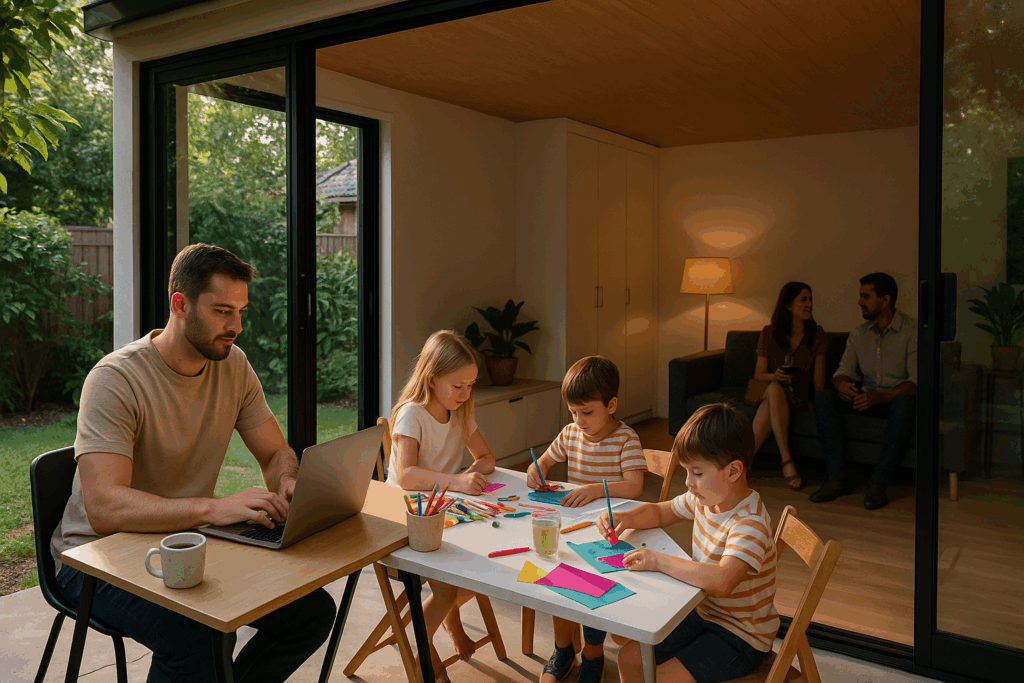
Backyard Studios That Work Around the Clock
Imagine having one space that changes with your day. In the morning, you sip coffee and handle emails in calm surroundings. By the afternoon, the kids take over with their art projects without you worrying about the mess. When evening comes, the same space turns into a spot where friends gather for drinks.
So how does this versatility work? Well, it begins with flexible storage and easy-to-move furniture. For instance, a desk that folds away when you’re done, cupboards that hide the clutter, and chairs that shift from work mode to social mode in seconds. The whole setup adapts without effort.
Our recent project in New Farm shows this in action. That family now uses one backyard studio as a daytime office, an afternoon homework station, and an evening entertainment room. The result is triple the usable space without triple the cost.
Water Features That Block Noise and Cool Your Space
Water features don’t need to just look pretty anymore, and Brisbane families are starting to realise this. They’re getting more practical by picking fountains that can block street noise while they work outside. At the same time, ponds with built-in seats give you cool spots to take afternoon breaks. Even small water walls can make your outdoor office several degrees cooler on those really hot days.
The trick is simple: think about what you need first, then worry about how it looks later. Your water feature should fix real problems in your backyard instead of just sitting there. For example, if you need privacy from neighbours, a bubbling fountain covers up your conversations naturally.
Similarly, when outdoor meetings get too hot, moving water cools things down without using any electricity. That’s why families we work with consistently mention how much they appreciate water features that serve multiple purposes in their everyday routines.
Flexible Outdoor Spaces for Every Season
We know that Brisbane weather changes fast, but your outdoor space can handle it all with the right design approach. You just need to build flexibility into your layout from the beginning so you’re not stressed out when conditions shift.
Summer Cooling Solutions
When summer gets really hot, shade becomes the most important thing for your outdoor space. That’s where pergolas with adjustable slats work great because they let you control how much sun comes through.
They also keep some air moving around. If the air still feels sticky, outdoor fans help keep things comfortable. You can also put plants around your seating areas to create natural cooling spots that make a big difference.
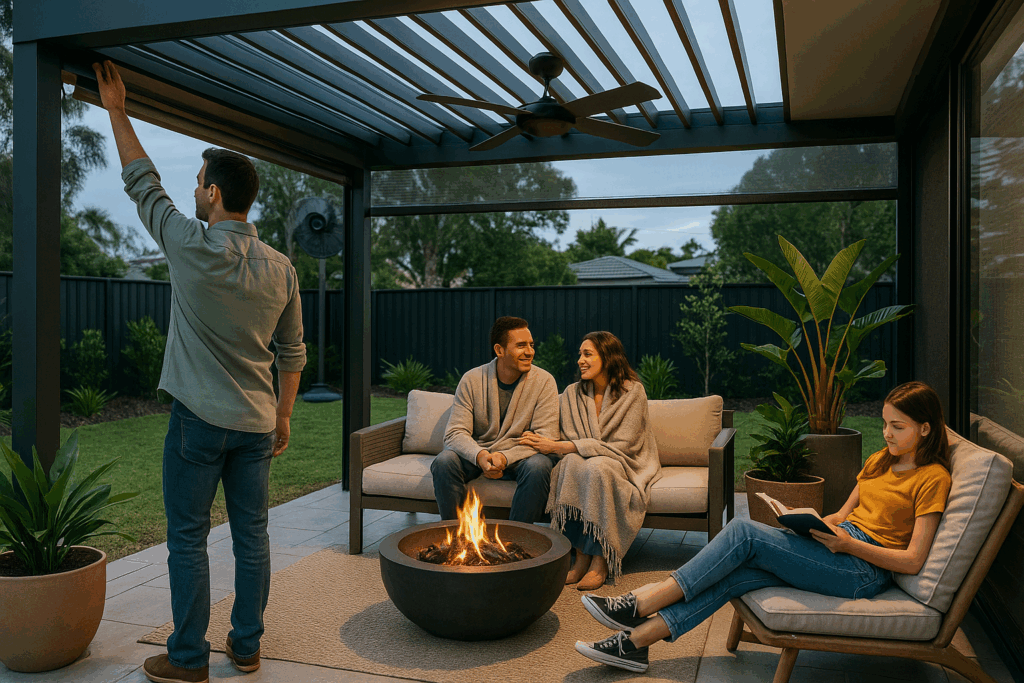
Winter Warmth Options
Fire pits keep people warm on cool evenings while naturally bringing everyone together around the flames. This creates a cozy gathering spot that works even when temperatures drop.
For even more protection from the cold, covered areas with heaters let you use your backyard when it gets chilly. To make these spaces more welcoming, outdoor rugs and cushions provide extra warmth and create that inviting atmosphere.
Wet Season Protection
Since heavy rain is a fact of life in Brisbane, use roll-down screens for protection and airflow, good drainage for puddle prevention, and waterproof storage for cushions to keep them dry. These steps help ensure your outdoor space stays comfortable and ready to use, rain or shine.
Planning for all types of weather from the beginning saves you money and keeps your family happy.
Your Multi-Functional Backyard Revolution Starts Today
Most Brisbane families struggle with underutilised outdoor spaces that sit empty while they’re cramped indoors. Multi-use backyard design solves this problem by creating flexible areas that adapt to your family’s changing needs throughout each day.
We explored outdoor workspaces, flexible garden studios, and water features that serve multiple purposes. Moreover, we discussed seasonal solutions that work with Brisbane’s unpredictable weather patterns.
Ready to redesign your backyard into a productive family haven? Contact Avalon Acres today for your free consultation and start living outdoors the way you’ve always wanted.
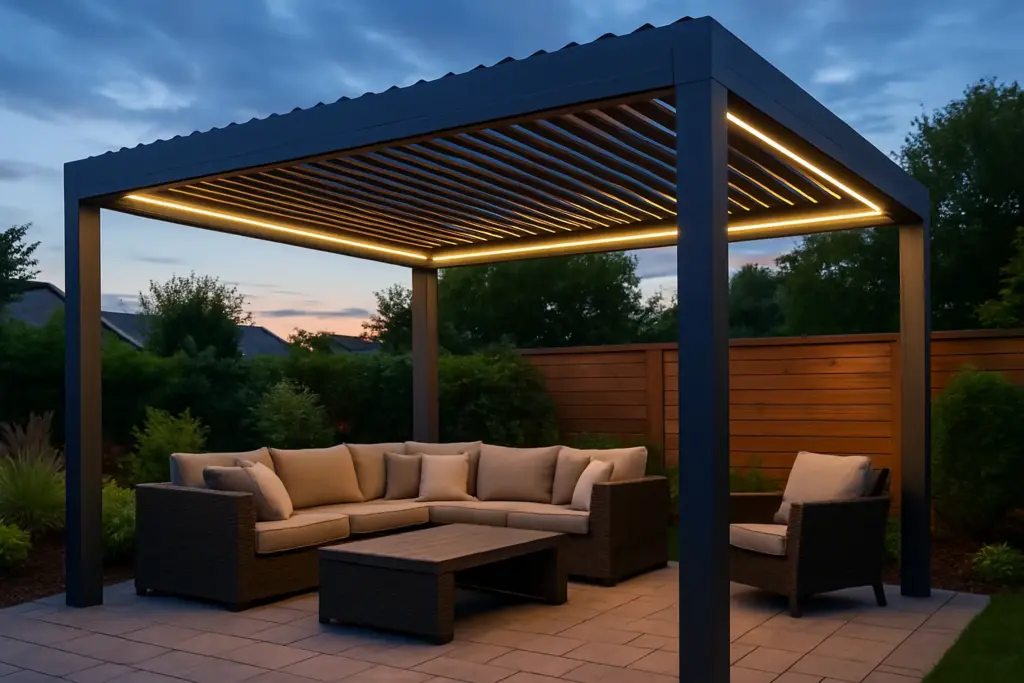
Picture this. You’re outside. The sun moves, and your pergola shifts gently to keep you in the shade. This is what smart pergola systems can do. They turn simple backyards into comfortable, stylish places that adjust to your needs.
In this guide, you’ll learn what makes these systems outstanding. We’ll also explain how they connect to your home, what features help, and how they change how you use your outdoor space. From lights and louvres to useful extras like fire pits, we’ll cover it all.
Want to enjoy your backyard more, without extra work? You’re in the right place. Let’s get started.
How Smart Pergolas Handle Weather Automatically
Smart pergolas are one of the most valuable upgrades in backyard technology. Why? Because they add valuable function to your outdoor area, which reduces effort and gives you more time to enjoy the beautiful outdoors.
Instead of adjusting louvres by hand or rushing to cover outdoor furniture, the system works for you.
These pergolas respond automatically to weather conditions. Sensors track light, rain, and wind so the system knows when to move.
Here is a brief breakdown of various sensors:
Light sensors: Too bright to see your screen? Let the pergola take over. Light sensors adjust the slats automatically when the sunlight gets intense. Smart pergolas can open and close the roof slats based on brightness. Instead of squinting or shifting around, you’ll get just the right amount of filtered light.
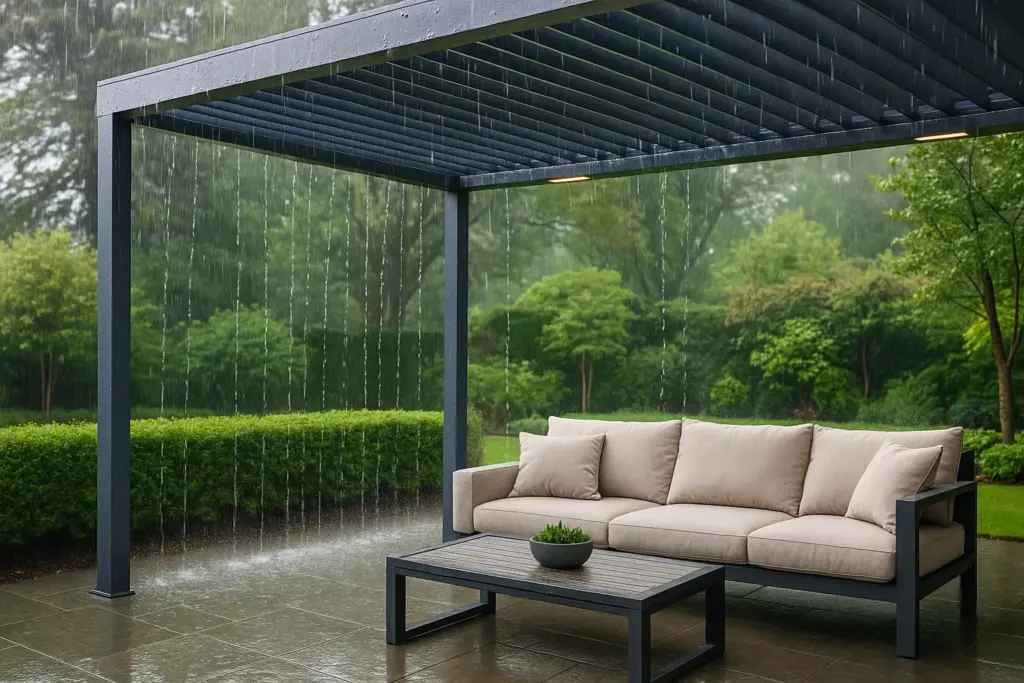
Rain sensors: Rain sensors of your pergola detect water early and shut the roof before your cushions soak through. You won’t have to dash outside mid-dinner to save the outdoor rug again (we’ve all been there).
Wind sensors: If the wind starts blowing hard, the sensors pick it up and adjust or lock the louvres to keep things steady. This helps protect the pergola and keeps your setup from getting messy.
Smart hubs connect your pergola to your home assistant or smartphone. You can set schedules to match your daily routine or use voice commands to adjust settings anytime. For example, you can close the roof during the afternoon sun, open it for cooler evenings, or dim the lights for a calm dinner.
Our research indicates that responsive systems like these improve outdoor usability and reduce the need for manual maintenance. This kind of hands-off comfort makes it easier to stay outside longer and use your outdoor space more often.
Now, let’s move into layout ideas that help you design a setup that works for your lifestyle.
Designing the Ultimate Outdoor Space
When you’re setting up your outdoor space, the layout matters just as much as the furniture. A smart pergola can help shape the flow, which offers function with comfort.
Start by thinking about how you want to use the space. Is it for outdoor dining areas, reading, or family gatherings? Once that’s clear, place your pergola where it supports those activities. It could be next to the patio, near a deck, or in a quiet corner of the yard.
Positioning should feel natural. Keep access points clear and make sure there’s enough room to move between seating and other zones. You don’t want to squeeze around furniture every time you step outside. It’s not a maze. It’s a backyard.
Add features that match your needs:
Adjustable louvres: Need control over the sun and breeze? Adjustable louvres let you control sunlight and airflow throughout the day. You can tilt them to stay cool when the sun gets too strong or let in more light when the day starts to cool down. It’s an easy way to keep your area comfortable without having to move your chair every 20 minutes.
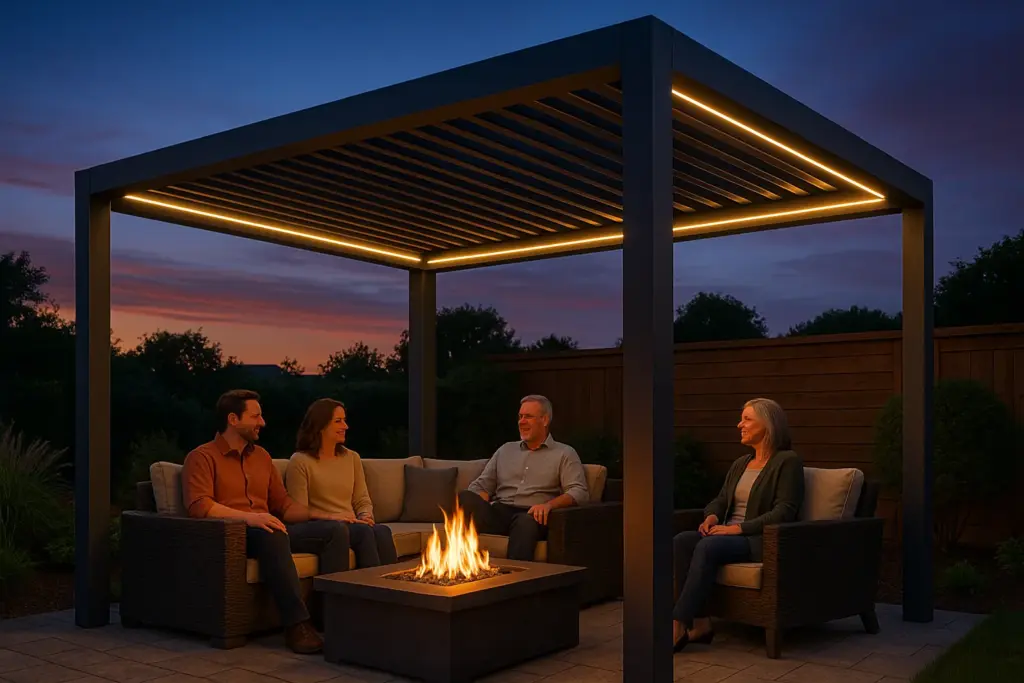
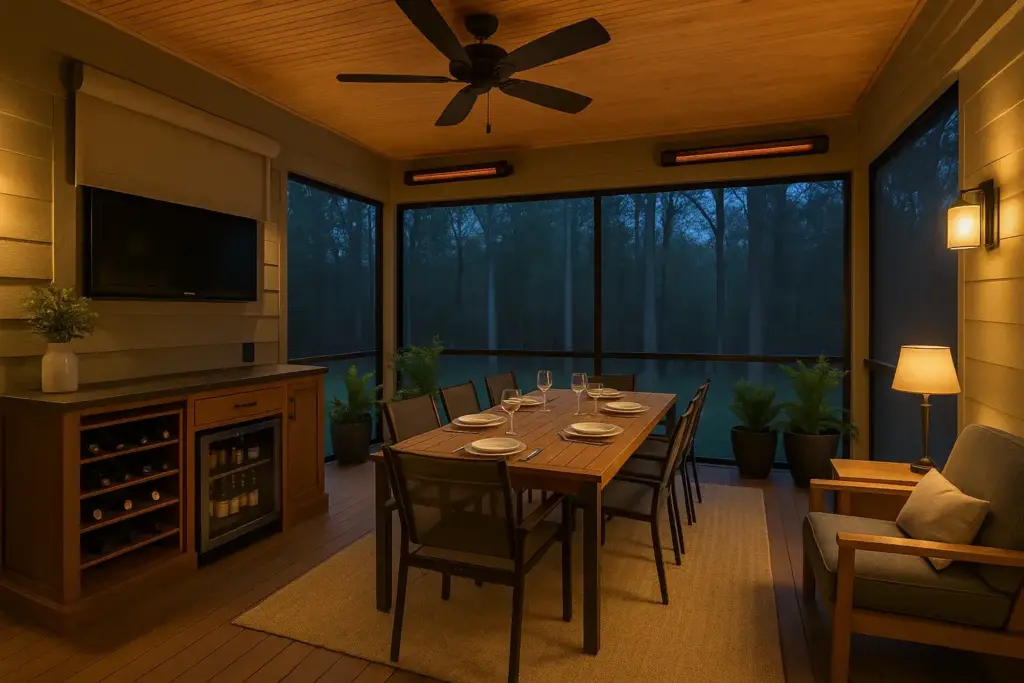
Integrated lighting: Integrated lighting, or built-in lights, means you don’t have to head inside when the sun goes down. You can keep the area bright enough for dinner, games, or just hanging out. The lights are usually tucked into the pergola frame, so they look neat and don’t get in the way.
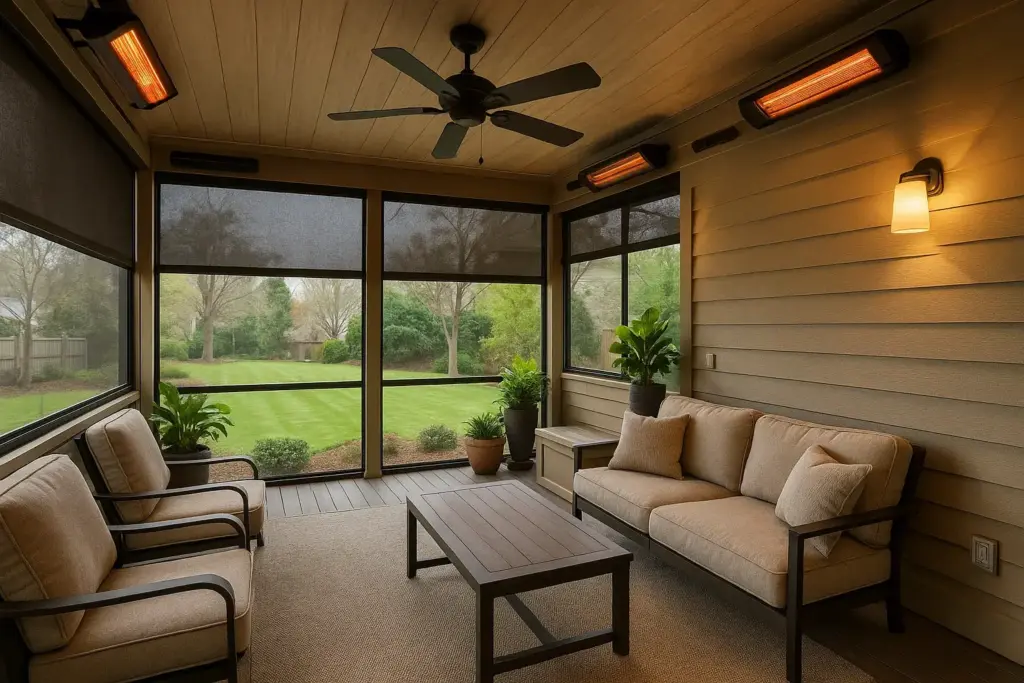
Heating options: Many heating options, like infrared or electric heaters, are available for your smart pergola. These heaters can be used to stay warm. They fit neatly into the pergola setup and make it easier to enjoy the space without layering on three jackets.
A well-placed pergola turns open yard space into something practical and welcoming. It blends comfort with purpose, which makes the area more usable, even on days with changing weather.
Based on our firsthand experience designing outdoor living spaces, small layout tweaks change a lot of the outlook. For example, shifting the pergola a few feet to align with a doorway or create a dining zone can change how the space is used.
A good setup is only half the story. Let’s see how the structure itself steps up the experience.
Make Your Pergola Roof Weather-Ready
Add weather sensors, automation, and responsive controls to keep your pergola roof ready for any forecast. There are so many things you can add to make your pergola “smarter”. They are built to respond at your command.
With built-in sensors and automation, it turns your outdoor living area into a space that adjusts in real time. There’s no need for constant attention.
Here’s what makes it work so well:
Weather Sensors That Respond Instantly: These detect changes like rain, wind, and intense sunlight. When the rain starts, the roof slats close automatically. If it gets too windy, the system adjusts for safety. You won’t even need to pause your conversation.
Automated Rain and Wind Control: Set it and forget it. The pergola knows when to open, close, or lock in place based on what the weather’s doing. That means better protection for furniture and fewer interruptions.
Remote and Voice Control: Want to change the settings manually? Use your remote or link it to a smart assistant. You can also open the roof, dim the lights, or shut everything down without stepping outside.
Smart Features That Reduce Maintenance: Because the system reacts on its own, there’s less wear and tear from unexpected storms or sun damage. It also means fewer clean-ups after bad weather.
Together, these tools make the structure create a weather-aware system that keeps your outdoor space usable, protected, and low-fuss in all seasons.
Next up, we’ll move on to how to customise your pergola to fit any outdoor space.
How Smart Pergolas Fit Any Outdoor Space
One of the best things about smart pergolas is how easily they can fit into different spaces. You don’t need a huge deck or fancy landscaping. The structure adjusts to what you already have.
Some people install a full-sized system across their yard. Others go smaller and place one in a side area or on a balcony. Either way, the smart features stay the same.
Here’s how a smart pergola can work in different spots:
Small Patio: A smaller pergola gives you a place to relax without taking up all your space. It’s great for morning coffee or a shaded break in the afternoon. You still get automated control and optional lighting on a smaller scale.
Rooftop or Deck: Smart pergolas work well in high or windy areas, too. Add privacy screens and wind sensors to keep the space calm and usable. Use built-in lights or heaters to enjoy the view after dark.
Full Backyard: If you have more room, use the pergola to split your space into zones. One area for eating, one for lounging, one for a fire pit. It helps organise your yard while adding comfort and style.
Pro Tip: Before you install, take a little time to watch how the sun moves across your space and where the wind usually comes from. It’ll help you place your pergola in the best spot for natural shade and comfort, with fewer adjustments needed later.
When the setup fits your space, everything feels easier to use. Next, let’s see how these smart systems compare with traditional pergolas and what makes the switch worth it.
Why Smart Pergolas Are Better Than Old Ones
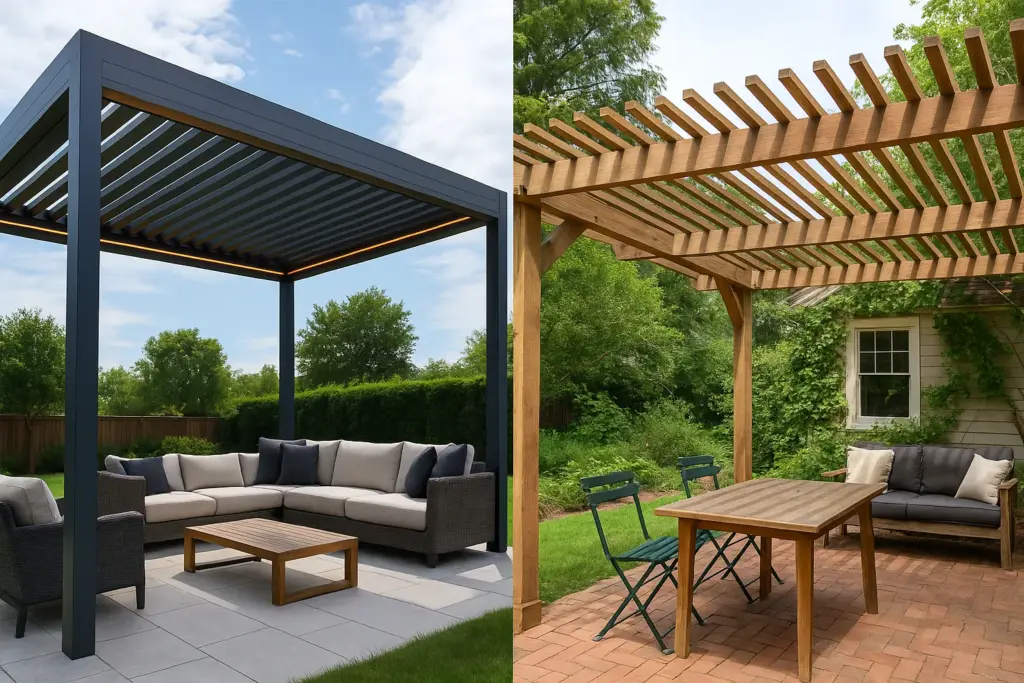
Traditional pergolas have their place. They bring a classic look to a backyard and can make a space feel comfortable. But when the weather turns or you want a bit more control, they don’t offer much help.
That’s where smart pergolas stand out with real features that work for real life. Let’s explore why and how.
Traditional Pergolas Stay Put
Traditional pergolas have slats or beams that don’t move. If the sun shifts, you shift with it. If it starts to rain, everything under the pergola, furniture, food, and people get wet. They’re also no help when it gets too windy. At best, you get a little shade. At worst, you get soaked.
They’re fine if you just want to hang lights or grow a vine. However, they fall short if you’re hoping to use the space often in different seasons.
Smart Pergolas Do the Work for You
Smart pergolas take the same structure and make it smarter. They have sensors that detect sun, wind, and rain, and they adjust automatically. Louvres tilt for shade when it’s hot, close when it rains, and brace when it gets windy.
You can still control it manually through an app, remote, or voice assistant. You can open the roof, dim the lights, or warm things up while staying on the couch.
A traditional pergola adds a nice touch. But a smart pergola gives you comfort, control, and fewer weather worries. One looks good. The other works for your life.
Let’s move on to how smart pergolas help you enjoy your outdoor space all year long.
How Smart Pergolas Make Every Season Comfortable
With a smart pergola, you can use your outdoor space without checking the sky every 10 minutes. These systems use clever tech to keep things comfortable no matter the season.
Louvres, heaters, sensors, and a few extras do the work, so you don’t have to chase the sun or rush to cover the cushions.
Summer Setup That Keeps You Cool
On hot days, you want shade, air, and maybe a little help from technology. Smart pergolas use sun sensors to adjust the slats as the day goes on. So you stay shaded without lifting a finger.
We recommend that you add a ceiling fan, a misting system, or even motion-triggered blinds (Yes, those exist.) With airflow, adjustable light, and remote access, your space becomes a spot you want to hang out in.
Winter Features That Keep the Chill Out
Cold weather doesn’t have to cut the fun short. You can install outdoor heaters, radiant heating panels, or wind sensors that close things up before the breeze gets annoying.
Add side screens for extra protection, and use built-in lighting to make early sunsets feel like no big deal. You can still have coffee outside or enjoy a quiet dinner. Just swap the iced tea for something warm.
When you have the right setup, your pergola doesn’t take a season off. You can also step up your pergola dream by adding a fire pit.
Add a Fire Pit and Take Your Smart Pergolas to the Next Level
If your smart pergola is the comfort, the fire pit is the character. It brings warmth, glow, and that little bit of magic that makes you want to stay longer outside. There’s something about sitting by a fire that slows everything down and makes the space feel more personal.
A fire pit adds a natural centre to your outdoor setup. It draws people in. Even when it’s off, it helps define the layout. Now that we’ve covered the mood your fire pit can set, let’s talk about what makes it practical too.
You’ll see when it’s lit, the fire pit adds movement and warmth, and yes, that soft crackling sound that somehow makes people talk more and scroll less. You might not plan to stay out long, but somehow you always do.
Fire pits come in all types. They could be wood-burning, gas, or electric. Some include push-button ignitions, safety shutoffs, or even smart controls that pair with your phone. So, you’ll hunt no more for the lighter or guess if the gas is on. And no more matches that blow out three times before working.
Add a fire pit under your pergola, set the louvres just right, lower the lights, and suddenly the whole space changes. You’ve got atmosphere, comfort, and an easy excuse to spend more time outdoors.
Bring Smart Comfort to Your Backyard
A smart pergola helps you get more use out of your backyard. It takes care of the weather stuff like too much sun, surprise rain, or a gust of wind. You just walk outside, settle in, and enjoy the space without any worries.
Throughout this guide, you’ve seen how these systems work in all kinds of settings and all seasons. You’ve also seen how easy it is to personalise your setup with fire pits, lighting, screens, and more.
If you’re ready to enjoy your outdoor area without the constant setup and stress, now’s the time to make a change.
Avalon Acres offers smart pergola systems designed around how you live. Let’s build something that works for you every day of the year.
Tired of outdoor plans getting cut short by weather or bugs? A screened-in porch fixes that. It’s covered, comfortable, and works in every season, rain or shine.
You stay dry, keep the insects out and still enjoy the fresh air. Add a few smart features, and it’s perfect for morning coffee, family dinners or relaxed evenings with friends.
In this guide, you’ll learn how to plan your layout, pick materials that hold up in any weather, keep things comfortable year-round and style your space to feel like part of your home. You’ll also find practical screened porch ideas to help turn your backyard screen enclosure into a space you’ll use.
Let’s get started and build a spot that works every day of the year, not just when the sun’s out.
Why Go for a Screened-In Porch?
There’s a good reason many homeowners are adding screened-in porches to their outdoor spaces. They offer the best mix of fresh air and everyday comfort, without the downsides of bugs, harsh sun or sudden weather changes.
Let’s take a look at the benefits:
Better than an open patio: You’re no longer at the mercy of mosquitoes, flies or sudden downpours. A screened porch lets you enjoy your morning coffee or host friends without swatting insects away or running inside when the weather turns.
More affordable than a sunroom: While sunrooms require full foundations, insulated glass and HVAC connections, screened-in porches are far more budget-friendly. You can create a beautiful, enclosed space for a fraction of the cost.
Perfect for all seasons: Add a ceiling fan for summer breezes and a space heater for chilly months. Then the porch will stay comfortable throughout the year. Some homeowners even use vinyl or retractable panels to block wind or trap warmth during colder seasons.
Adds long-term value: A well-designed screened porch increases the livable space of your home, which often boosts its resale value. Buyers appreciate the idea of a separate corner to relax, unwind or entertain without stepping too far from the comforts of indoors.
Before you start decorating, it helps to get the layout right. Here’s how to set up your porch so it’s easy to use and comfortable all year.
Layout Planning for Comfort and Function
Good layout planning for your screened-in porch ensures that the space feels natural to use, so you and your loved ones stay comfortable in every season. The way you arrange things affects your mood and sets the tone for everything else.
But how do you do it? Let’s find out below.
Think in Zones: Dining, Lounging, and Greenery
You can create defined areas for different uses to make the most of your space. A lounging zone with cushioned chairs or a corner sofa works well near the view. And a small dining set closer to the door makes serving easier.
Also, don’t forget greenery. Potted plants or vertical gardens soften the look and make the space feel luxurious and welcoming. And use outdoor rugs to visually separate each zone.
Plan Traffic Flow and Entry Points
No one wants to sidestep furniture every time they enter or exit. Leave at least 90 cm of clear walking space between zones. Besides, placing entry points in logical spots, ideally near the kitchen or main living area indoors, will ensure that you can carry food or drinks seamlessly.
And if you are using screen doors or sliding panels, be mindful of how doors swing open.
Map Out Lighting and Electric Access
Comfort usually comes down to small details like where lights or plugs are located. Make room for overhead lighting or wall lamps, but also plan outlets for fans, chargers or even a mini fridge.
Additionally, you can add a dimmer switch if you want more control over the mood, especially in the evenings.
Include Seasonal Storage
Think ahead to where you’ll put cushions, blankets or outdoor candles during off-seasons. Built-in benches with hidden compartments or waterproof storage chests work well without cluttering the space.
Hooks or shelves along the wall can also hold throws, lanterns or gardening tools.
Pro Tip: Drawing from our experience, sketching out your furniture placement first helps avoid regrets later. Visual planning reveals pinch points and lets you test different arrangements without lifting a thing.
Seasonal Comfort: Heating, Cooling, and Ventilation
Seasonal comfort means designing your porch so it’s enjoyable on the hottest summer afternoon or during a chilly winter morning. With the right planning of ventilation, heating and cooling features, you can turn your backyard screen enclosure into a true four-season retreat.
Temperature Control Options
Adding smart heating and cooling elements means you’ll use the porch more often and enjoy it longer into the year. The right combination can be done this way:
Ceiling Fans: Outdoor-rated ceiling fans help move warm air out and pull cooler air in. This creates a wind effect, which can lower the perceived temperature by several degrees. Many models come with remote control or reversible motor features for use during winter, too. You’ll have to pay around $120 to $250 for these fans, including installation.
Infrared Heaters: These heaters provide directional warmth. They heat people and furniture rather than the air, and they are energy-efficient and perfect for winter evenings. Wall or ceiling-mounted models don’t take up floor space and usually include adjustable settings. Their prices start at $200 and can go up to $500 depending on the coverage area.
Passive Ventilation: This includes features like open gable ends, screened transom windows or louvres that let hot air escape and cooler air enter. Passive ventilation needs no electricity. And when they are designed well, passive airflow can regulate temperature naturally. It’s ideal for reducing costs and maintenance in the long term.
Add Insulation Underfoot
The floor plays a significant role in temperature control. Insulating from underneath keeps things warmer in winter and cooler in summer.
Thermal Rugs or Mats: These act as a cosy barrier between your feet and a cold floor. They’re ideal during colder months and also add visual warmth to the space. Choose materials rated for outdoor conditions to avoid mould or mildew. And for the price, a decent-sized thermal outdoor rug costs between $80 and $150.
Insulated Flooring: Installing composite decking over insulation panels helps maintain a more stable surface temperature. This setup prevents heat from escaping in winter and reduces the heat transfer from hot surfaces in summer. It can add $600 or more to your build, but it’s worth it if year-round use is a priority.
Energy-Efficient Shades
These flexible upgrades help regulate temperature and light without taking up much space. They’re one of the easiest ways to boost all-season comfort.
Retractable Shades: These shades offer on-demand temperature control by blocking direct sunlight during the day and providing insulation at night. Their motorised versions allow you to adjust coverage with the push of a button. On the other hand, solar fabric options help reduce UV damage to furniture. Their prices start at $300 and vary by size and features.
Climate-Specific Tips
Your local weather has a hand in how your porch should be set up. Adjusting it to your climate keeps it functional irrespective of the season.
Hot Regions: Use cross-breeze layouts by positioning openings on opposite walls. Add light-coloured shades to reflect heat and install misting systems to cool the air. Also, keep seating in shaded zones, and avoid dark flooring that absorbs heat.
Cold Climates: Install insulated curtains, use radiant heaters and enclosed flooring. Heavier textiles, thermal rugs and sealed window panels can retain heat effectively. And position your seating near heat sources for maximum comfort.
Coastal Homes: Prioritise corrosion-resistant materials like stainless steel for fixtures and marine-grade fabric for cushions. Plan for strong airflow with large screened openings to prevent stale, damp air from settling. And your furniture and features should be easy to wipe down due to high humidity and salt exposure.
Durable Materials That Last All Seasons
Comfort and climate control matter, but your screened-in porch also needs to hold up against the elements. Rain, sun, humidity and cold can all wear down poorly chosen materials. That’s why durability matters.
Using the right materials ensures your space looks good, functions well and lasts for years with minimal maintenance. Let’s look at smart material picks that fit all seasons and keep your screened porch ideas low-effort yet long-lasting.
Flooring Options
Your flooring faces constant exposure to weather changes, spills and foot traffic. It needs to be strong, easy to clean and resistant to moisture.
Two standout choices balance beauty and long-term performance, and here they are.
Treated Wood
Pressure-treated timber is a classic choice for porches. It’s widely available, resists rot and insects, and can be stained or painted to suit your style. However, it does need occasional sealing and may suffer over time. You’ll need to pay around $100 to $150 per square metre for materials and installation.
Composite Decking
Made from a combination of wood fibres and recycled plastics, composite boards resist moisture, warping and fading. They require almost no preservation and last far longer than timber. It costs a bit more upfront, roughly $180 to $250 per square metre, but pays off in lower maintenance over the years.
Screening Choices
Screens are what separate a screened-in porch from a patio. They protect you from insects and filter light and breeze. Picking the right screen depends on your climate, how much sun exposure you get and how much wear and tear you expect.
Fibreglass
This is the most common screen material. It’s flexible, budget-friendly and doesn’t crease easily during installation. While it’s not the strongest option, it’s perfect for light-use areas. Costs start around $1.50 per square metre.
Aluminium
Aluminium screens are stronger and more durable than fibreglass. They’re great for areas with pets or high traffic. However, they can dent or crease if hit hard. Their pricing sits at about $2.50 to $3.50 per square metre.
Solar Mesh
This specialty screen blocks heat and UV rays while still allowing airflow. It’s ideal for hot, sunny climates and protects your furnishings from fading. It’s more expensive, starting at $4 to $6 per square metre, but it adds noticeable comfort.
Choose outdoor-rated furniture made from powder-coated aluminium, teak or synthetic wicker. These materials won’t rust or rot.
Pair them with mildew-resistant cushions and covers made from solution-dyed acrylic or olefin fabric. These textiles resist moisture, stains and UV rays, keeping your porch tidy and comfortable with little effort.
Pro Tip: Based on our past experiences, investing in composite decking and solar mesh screens cuts down seasonal repairs significantly. Homeowners often report that their porches stay looking new with almost no extra work.
Creating Comfy Vibes Year-Round
Style and structure matter, but a screened-in porch only feels complete when it invites you to unwind. Comfortable vibes always make the space feel warm, welcoming and lived-in. Whether you’re relaxing solo or hosting guests, small touches in lighting, texture, and scent go a long way.
Here’s how to set that tone beautifully.
Soft Lighting
Good lighting transforms how a space feels after sunset. It’s about warmth and glow. Think layers of light instead of relying on a single overhead bulb.
Use lanterns or battery-operated table lamps to create a soft glow in the evenings.
Fairy lights strung along beams or railings add a touch of magic and work well all year.
Wall sconces with warm LED bulbs give a built-in look and work great for mood-setting at night.
Layered Textiles
Soft furnishings bring the indoors out and make the porch feel much more inviting. They also help with seasonal flexibility. You can easily swap fabrics depending on the time of year.
Toss a few blankets or chunky throws across your chairs or bench seating.
Add plush cushions in outdoor-friendly fabrics for both comfort and colour.
Hang lightweight curtains to soften hard edges and add privacy during the day.
Fire Features
Adding a flame element instantly changes the vibe. It draws people in and offers literal warmth. That makes your porch usable even when the air gets chilly.
A small electric fireplace creates a warm focal point and starts at around $300.
Tabletop heaters powered by gas or electricity are portable and compact, with prices ranging from $150 to $400.
Extra Tip
Scent is a subtle but powerful part of the experience. It can calm the mind, boost your mood or keep your space bug-free.
Add essential oil diffusers with lavender or cedarwood for a relaxing scent.
Use citronella candles to keep bugs away while making the space smell fresh.
With the right mood and materials in place, you’re ready to enjoy your porch at its best. Now, let’s make it functional for entertaining. This way, it works just as well with guests as it does for a quiet afternoon.
Entertaining in Every Season
For many households, the weather often limits how and when guests can be entertained outdoors. Rain, wind, insects or chilly nights usually mean cancelling plans or moving inside. But a well-designed screened-in porch removes those limits.
But how? Let’s know about it.
Built-in or Portable Beverage Station
A drink station makes things feel more relaxed when people drop by. You’re not running back and forth to the kitchen, and everything’s right where you need it. It adds a casual, ready-to-go feel that makes hosting easier.
You can consider these options:
Portable Setup
A rolling bar cart or fold-out station adds flexibility. Easy to store or move, and usually costs around $150. It’s ideal for casual gatherings and can be styled to match the season or occasion.
Built-in Counter
For a more polished feel, install a counter with shelves, a mini fridge or a wine rack. This setup costs between $500 and $1000, based on your material and finish. It keeps everything in one place, making it easier to host without running in and out of the house.
Year-Round Dining Ideas
The right table setup means you’re always ready to serve snacks or full meals. Consider your space and how often you host when choosing the size and type.
Choose one among these options:
Compact Tables
Small, bistro-style tables are great for morning tea or casual meals. Easy to move and tuck away, they start from $100. These are perfect for couples or smaller families who want flexibility without clutter.
Extendable Tables
These are great for entertaining larger groups. Choose materials that resist weather changes, like powder-coated metal or treated wood. And their prices range between $300 and $800.
Extendable options let you adapt the space for everything from family dinners to game nights.
Entertainment Setup
Want to take your porch to the next level? Add features that let you enjoy music, films or footy nights without needing to head indoors.
Weather-Proof Speakers
These are designed to handle rain and temperature shifts. With wireless connectivity and long battery life, they’re perfect for any season. You can keep the vibe going from morning coffee to evening gatherings, all without fiddling with wires or worrying about damage.
Mounted TV with Roll-Down Cover
A wall-mounted, weather-resistant TV makes your porch entertainment-ready. The roll-down cover protects it from dust and moisture.
The total cost may range from $600 to $1500. These are great for movie nights, live sports or even streaming music playlists in the background.
Custom Touches
A personal corner adds heart to your screened-in porch. If you love books, board games or quiet time, a corner set up for your interests makes the space feel like very own.
Game Corner
Use a small cabinet or open shelf to store games. Add a simple table and chairs for evening fun. This setup can be done for under $100. It creates an instant social spot where guests can relax and interact without screens.
Reading Nook
A comfortable chair, warm throw, and side table with a lamp can create this perfect solo escape. Plan on spending around $250 for a comfortable and inviting setup. It’s ideal for quiet mornings, midday breaks or winding down before bed.
With these thoughtful additions, your screened-in porch becomes a space you can use through all seasons. Rain or shine, alone or with company, it’s ready whenever you are. Next, let’s look at some smart tech and enclosure upgrades to make it even more adaptable.
Smart Screen Enclosure Upgrades
A few smart upgrades can make your backyard screen enclosure more versatile, secure and energy-efficient. These features offer reliable performance, reduce manual effort and help you adapt your porch to changing weather and light conditions.
If you’re looking to get more comfort with less bother, these enhancements are worth considering:
Motorised Retractable Screens: These let you open or close the enclosure with the push of a button. They are great for controlling airflow, blocking the sun or gaining privacy as needed. They’re also ideal for multi-season use and cost between $1200 and $3000, depending on size and controls.
Storm Panels or Four-Track Vinyl Windows: These panels or windows add weather protection and extend your porch’s usability during colder months or heavy rain. Four-track vinyl windows are flexible and allow partial or full opening. The pricing typically ranges from $600 to $1500 per panel set.
Solar Screens for Energy Efficiency: These block harmful UV rays, reduce indoor heat and protect furnishings. They’re perfect for sun-exposed porches and cost around $4 to $8 per square metre. They also improve daytime privacy.
Sensor-Activated Lighting: Lights that turn on when someone enters the space make evening use easier and safer. These systems range from $100 to $400 and can be integrated with other smart home tech.
With these upgrades in place, your porch becomes smarter, more adaptable and easier to use in any weather. Up next, let’s explore how to tailor your design based on local climate needs.
Climate-Specific Design Advice
Your local weather conditions shape everything from material choice to furniture layout in a screened-in porch. What works beautifully in a dry inland area might fall apart or feel uncomfortable in a humid, tropical spot.
Customising your screen enclosure for your specific climate ensures it performs well, feels great to use and lasts for years. It’s important for long-term satisfaction and comfort.
Tropical Climates
Hot, humid weather and strong sun exposure are constant challenges. Here, your focus should be on staying cool, preventing moisture damage and protecting fabrics and finishes from harsh UV rays.
Install UV-blocking solar screens to reduce interior temperatures and protect furniture from fading. They also help keep the space usable during the midday sun.
Use mould-resistant fabrics like solution-dyed acrylic for cushions and curtains. And materials like teak or synthetic wicker stand up well to moisture and don’t rot.
Add ventilation louvres or screened transom windows near the roofline to release heat and encourage airflow, even when the doors are closed.
Apply moisture-sealing treatments to any timber features at least once a year. This prevents warping, swelling and decay caused by constant humidity.
Cold Climates
Cold evenings and long winters can make outdoor spaces tough to use. That’s why your porch design should focus on keeping warmth in and drafts out.
Here are a few tips to make it happen:
Install insulated lower wall panels to act as a buffer against cold air. These can be removable or fixed and help reduce heat loss significantly.
Use radiant heaters or wall-mounted electric fireplaces. They warm people and furniture directly without wasting energy on unused air space.
Add thermal curtains or clear vinyl window inserts. These are especially effective at blocking wind and keeping warmth in during frosty nights.
Choose composite or insulated decking underfoot and layer thermal outdoor rugs to prevent heat loss through the floor.
Dry Regions
Low humidity, high daytime temperatures and dusty winds are typical in dry zones. Your design should manage dust control, reduce solar exposure and retain a sense of cool, breezy comfort.
So, how to manage these?
Use dust-resistant screen mesh with tighter weaves to reduce fine particles entering the porch, especially during windy days.
Plan for a shade-focused layout using overhead covers like pergolas or retractable awnings. And position furniture in naturally shaded areas to make sitting outside more pleasant.
Select light-coloured flooring and textiles to reflect sunlight and reduce radiant heat from hard surfaces. Avoid dark tiles or stone that can get hot underfoot.
Consider adding drip irrigation or misters near potted plants or green walls to naturally cool the air. These systems also help keep the atmosphere fresh without soaking the floor.
Through our hands-on experience, we’ve found that porches customised to suit local climate conditions last longer, perform better and need far less maintenance. Preparing your design thoughtfully from the start means fewer fixes and more relaxation down the track.
Ready to Transform Your Porch Into a Year-Round Escape?
A screened-in porch is a smart way to enjoy the outdoors without dealing with harsh weather or pests. It adds comfort, flexibility and extra living space that works all year.
In this guide, you’ve seen how layout, materials, seasonal upgrades and personal touches can shape a space that feels good to use every day. Each detail helps turn your porch into a spot that’s both practical and inviting.
Visit Avalon Acres for clear advice, thoughtful design ideas and solutions that fit your space. You’ll find everything you need to start building a porch that’s easy to enjoy, rain or shine.
Make your porch a place you’ll use often, not just once in a while.